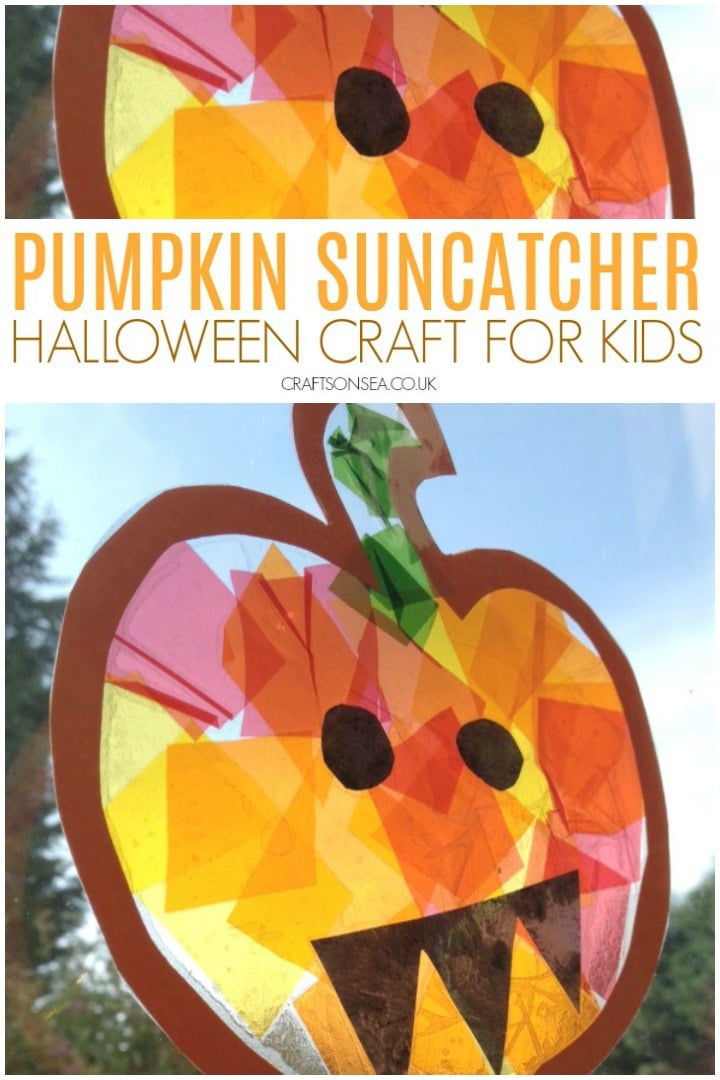
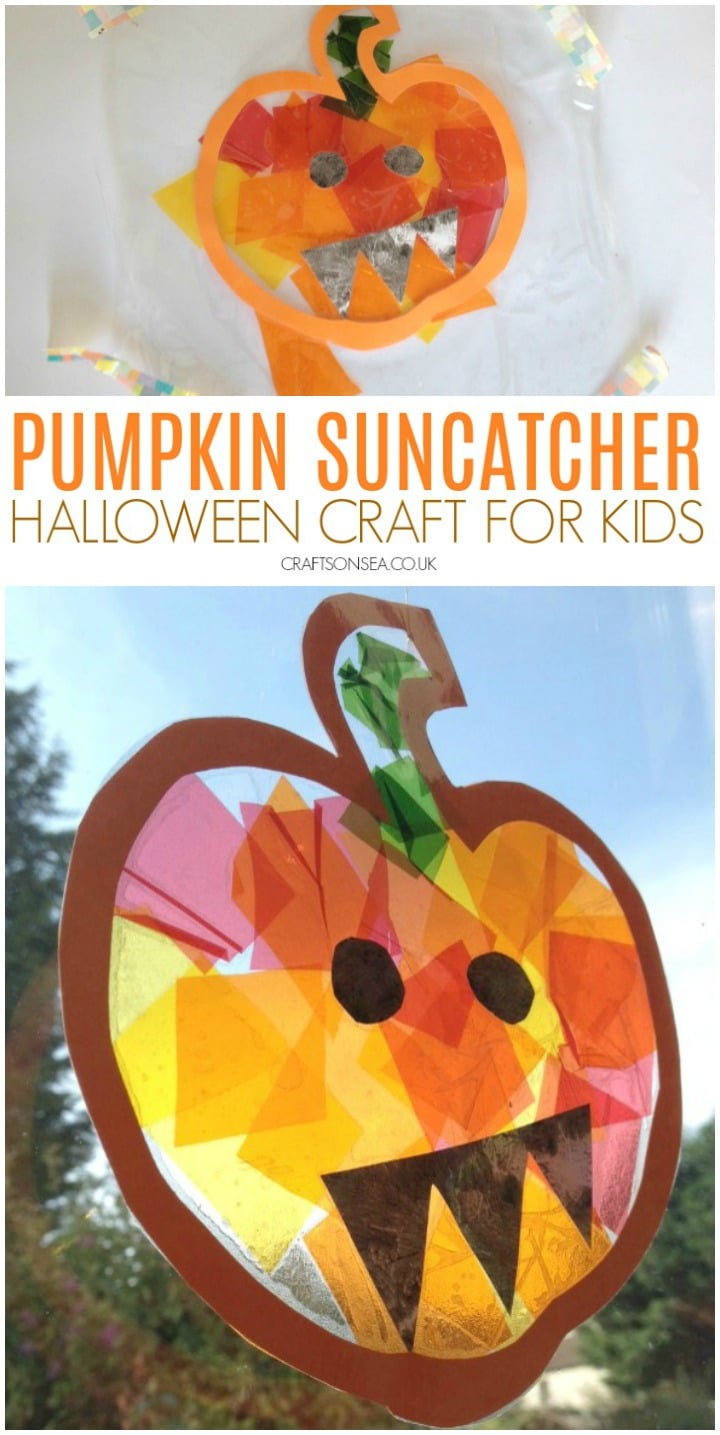
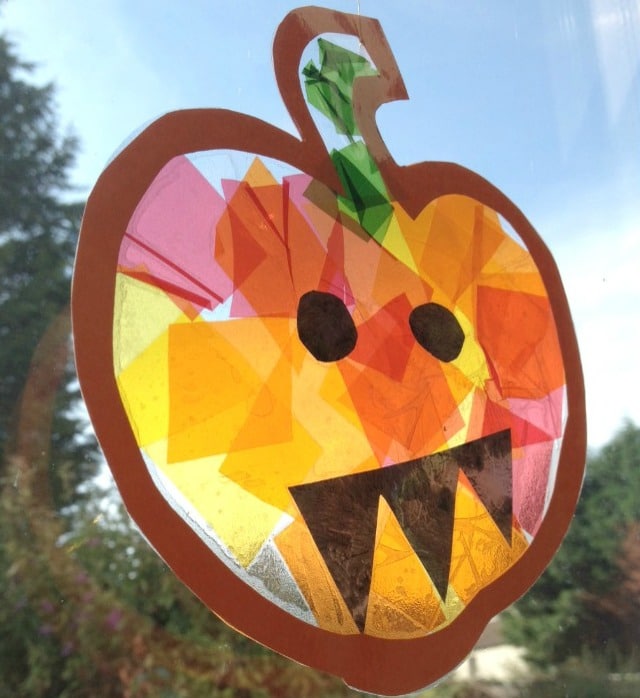
This stained glass pumpkin suncatcher is an easy Halloween craft that I made with my kids a few years ago and every year it’s been one of our most popular pumpkin crafts for kids.
Of course it’s not really glass but the materials used mean the colours are a bit brighter than you would get with tissue paper and with the end result looks like stained glass which also gave us a great opportunity to talk about color mixing.
This easy pumpkin craft is a fantastic activity for toddlers or preschoolers as it’s great for fine motor skills and you can use it to discuss color mixing practice and scissor skills too!
We have included affiliate links to some of the products and resources and as an associate we may earn from qualifying purchases.
What You'll Find on This Page
Easy Pumpkin Suncatcher Craft For Kids
This pumpkin suncatcher is a super easy craft to make and was a collaborative project between myself (doing any tricky cutting) and my son who was then a preschooler, if I can make this with a preschooler then you can make it too!
This was a really popular craft with my son and it stayed up in his window for months – always a good sign of something that they’ve enjoyed doing!
It does take a little preparation work as you’ll see (doesn’t everything really though) but it’s a great way to make a simple Halloween decoration and we enjoyed learning how to make the colour orange as well.
If you like to see how something has been made, and I often find these helpful, then you can check out the video tutorial I’ve shared on this page but of course I’ve also shared the written instructions for this craft too.
You’ll also find lots more ideas for easy Halloween crafts for kids at the end of this post.
Should you use cellophane or tissue paper to make a suncatcher?
Of course it’s completely up to you to choose what material to use to colour your suncatcher and I’ve seen both ways looking great.
We use colored cellophane because it tends to be brighter so I personally prefer the finished craft, the colours really pop when the sun streams through it.
I also think it’s a bit easier to see the colors mixing with cellophane but that could just be me.
Another benefit of cellophane is that if you’ve been saving those cellophane sweet wrappers this is totally the time to use them up!
Cellophane is really easy to cut, scissors pretty much glide through it, but if you want a little more resistance then go for the tissue paper.
Want to make a pumpkin craft that’s not a Jack O’Lantern?
I know that not everyone celebrates Halloween so if you want to make this pumpkin suncatcher to celebrate autumn, harvest or Thanksgiving instead just leave out the bit about adding the face.
You could even make our apple suncatchers at the same time and create a window full of fruit and vegetables.
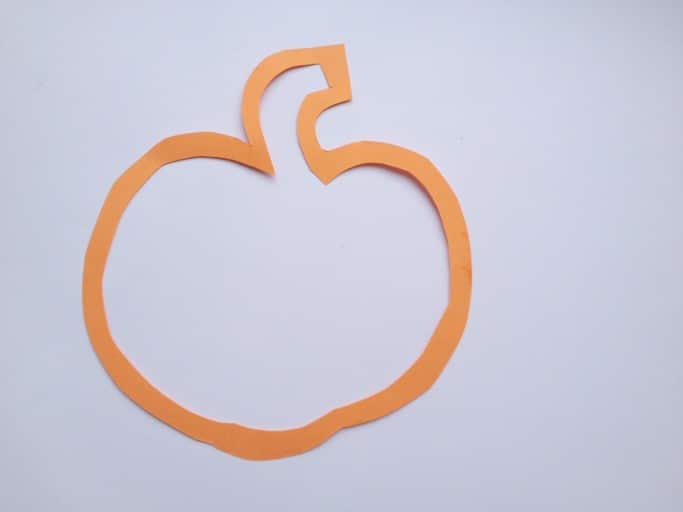
Free Pumpkin Craft Template
Since I wrote this post I’ve also shared a free pumpkin template that you might find helpful for making the outline of this craft with, make sure you check it out.
Pumpkin Suncatcher Materials:
-
- Colored cellophane
- Orange card
- Black paper
- Sticky back plastic (contact paper)
- Scissors
- Needle and thread (optional)

How to make a pumpkin suncatcher craft for Halloween
The first thing I did was to cut out a pumpkin shape from the orange card, I drew it in pencil first as I was a bit worried about going freehand! You can of course use the template above as a guide if you would prefer.
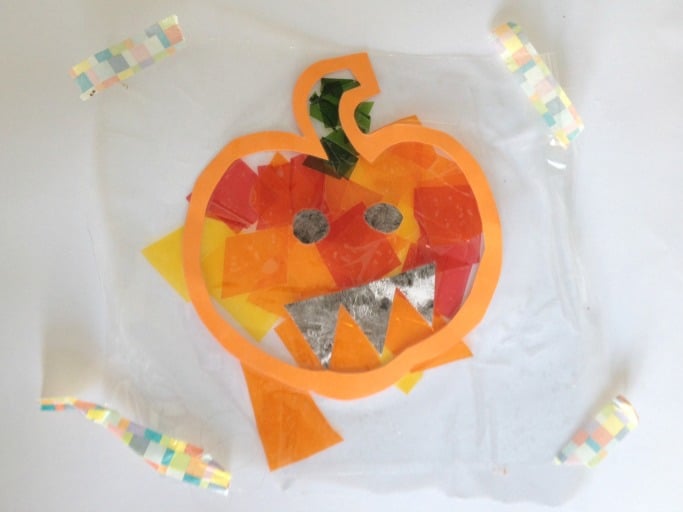
 Then I invited my son to join in. We stuck the shape down on some sticky back plastic.
TIP: stick down each corner with some sellotape or washi tape as contact paper will stick to anything going near it, ie my toddlers hands about 468 times.
I also cut out a ‘scary face’ from paper he’d previously painted black.
If you do have some black card that you can use then go for it and you could also use the black card to make the pumpkin shape as I’ve done in the video on this page.
TIP: Stick down your pumpkins eyes and mouth first so that they are securely in place exactly where you want them.
We then both cut out some shapes from cellophane to fill it in. I did the majority as he’s still a bit unsteady with the scissors and I like to keep to the amount he’s comfortable about doing but this is a great way for your kids to practice their scissor skills. He’s pretty happy to do all the sticking though!
I wasn’t sure if he knew about colour mixing so as well as doing orange for the main bit of the pumpkin we also did red and yellow so I could show him how orange is made. He then wanted more of these colours so I think that worked!
Once he deemed it finished we put another piece of sticky back plastic* on the top to hold it all in place. This is what our pumpkin suncatcher looked like.
 Sigh…man I love that washi tape!!
I then cut around the edge of the shape and our stained glass pumpkin was ready to be hung up in the window, all it needed was a needle and thread so it could be hung up.
TIP: If you don’t want to use a needle and thread you can make a piece of sellotape into a small loop and use that to stick your suncatcher to a window.

I think it looks super cute and I’m sure it will be scaring away lots of people on Halloween 😉
More Pumpkin Crafts For Kids
If you’re looking to make more easy pumpkin crafts then we’ve got you covered with tons of inspo and our free Halloween printables make it even easier for you to prepare low-cost activities quickly.
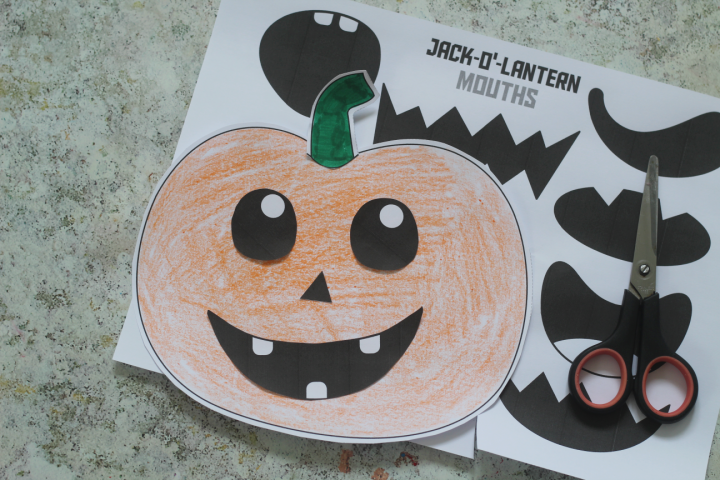
This printable trick or treat bag craft has a fun Jack O’lantern design and you can print and color lots of paper candy to fill it with – perfect for kids to play with.

Our cut and paste pumpkin craft is always popular with loads of noses and mouths for kids to choose from.
Making this with toddlers or preschoolers? You could cut out the pieces for them and let them design their own pumpkin face.
Finally our build a pumpkin printable is a great choice for parents, teachers or educators who are hoping to teach their kids a little more about pumpkins. We love the seeds that you can glue inside!

Equipment
- Scissors
- Optional: needle and thread
Materials
- Sticky back plastic (contact paper)
- Card black and orange
- Cellophane
- Washi tape or sellotape
Instructions
- Stick some sticky back plastic down, sticky side up, using washi tape or sellotape
- Cut a pumpkin shape out of card, cutting out the middle to give a edge of around 1-2 centimetres
- Stick the pumpkin shape onto the sticky back plastic
- Cut eyes and mouth out of black paper and card
- Stick the eyes and mouth onto the pumpkin shape
- Cut shapes out of yellow, red and orange cellophane
- Stick the cellophane onto the pumpkin

- Seal the back of the pumpkin by placing another piece of sticky back plastic onto it
- Cut out the pumpkin
- Display either using a needle and thread to hang it or with blutack or sellotape
Aw this is so cute! Good activity that I can do with my oldest children and even my toddler. Thanks for sharing:)
Glad you like it 🙂
This looks really cute, and would make nice Halloween decor too!
Thank you! 😀
Love this, definitely have to try this with my three, they would really enjoy making these 🙂 #letkidsbekids
This would be a great activity for my 3 kids aged 2,4 and 6 to do together. They lok really cool as well! I m off to pin it! #letkidsbekids
This is great. The cellophane adds a lovely vibrancy to the finished pumpkin. Pinning to my Halloween board x
Lovely idea, lots of fun and creative.
Thanks for linking #LetKidsBeKids
such a cute pumpkin!!
thanks Susen x
What a lovely idea. I really like the idea of a sun catcher, I must give it a go with my two! Thanks for linking up with #Playtime
Love this, I have just done this with my two, they are 4 and 17 months old and they loved it. It’s so nice to find something that I can do with both of them together. They are now stuck up on our window for all to see. 🎃
Oh that’s so good to hear! Glad they enjoyed it 😀
Loved this activity!! With two kiddos under 5, I really like finding mess-free crafts. I avoid having to call my local carpet cleaners every time we do a craft inside haha!