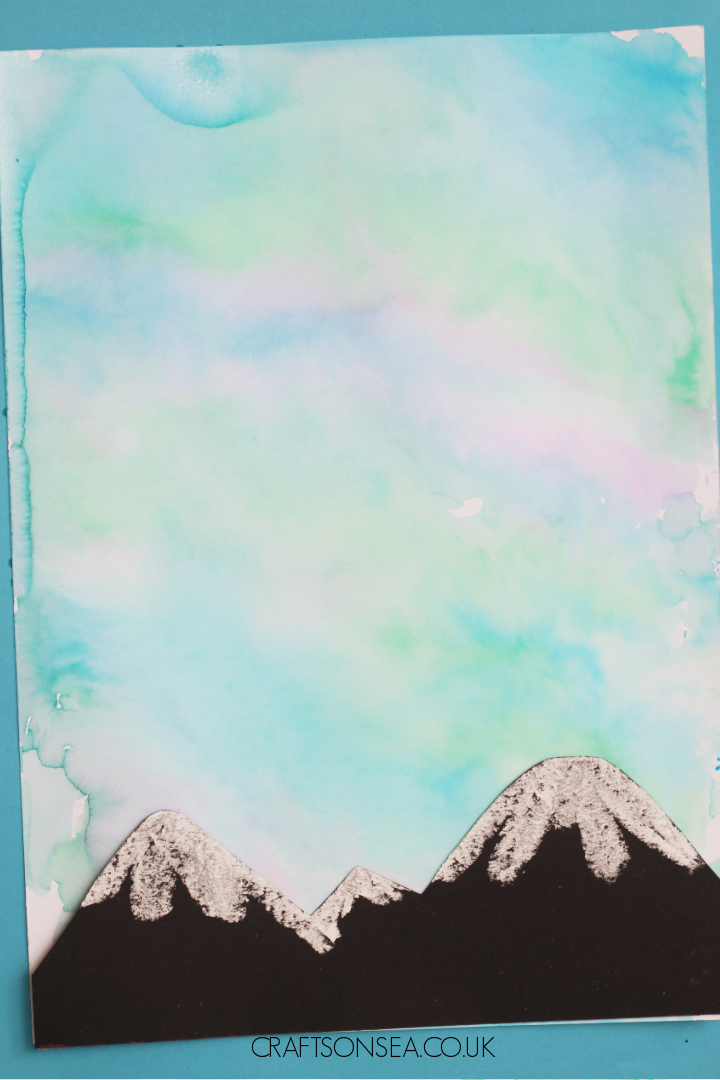
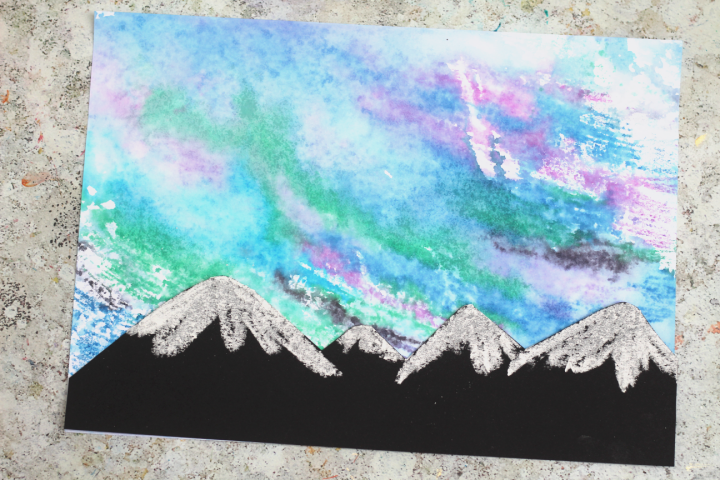
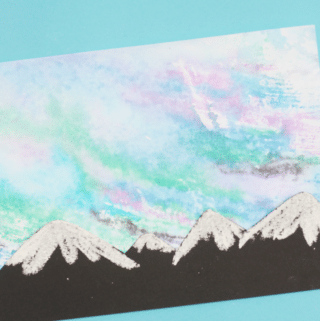
Doesn’t this Northern Lights art project look cool! I’m so happy with the way this turned out and even more importantly I’m very happy to report that this craft is super easy to make!
All you need is a few simple materials that most of us have at home (hello chalk and colouring pens) and you and your child can make some gorgeous winter art inspired by the aurora borealis.

We have included affiliate links to some of the products and resources and as an associate we may earn from qualifying purchases.
What You'll Find on This Page
Northern Lights Art Project
This craft looks really effective but it’s actually pretty simple to make using a water spray, like one that you might use on plants, to create the coloured rays of light.
As you’ll see in the images for this craft I’ve actually done this activity a couple of times so that I could see how using more or less water made a difference and you’ll find all my tips in the step by step instructions below as well as some ideas for how you could modify this activity for different ages.
If you haven’t looked at pictures of the northern lights before with your child then there’s a really good article on CBC Kids that explains all about what the northern lights are and has some really cool pictures of them too.
The article also talks about how no two northern lights patterns will look the same which I think is a great attitude to take into your art too – each one will be unique and you’ll have your own northern lights art that looks fantastic.
Materials Needed:
-
- White paper or cardstock
- Washable pens
- Kitchen foil
- Water spray
- Black paper or construction paper
- White chalk
- Scissors
- Glue
- Pencil
How To Create Your Northern Lights Art
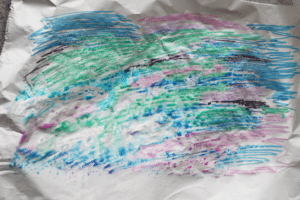
First grab a piece of kitchen foil that is larger than your piece of white paper.
Colour in your foil using washable pens, you want to ink to run in this craft but likewise you don’t want it to permanently stain anything else it happens to touch (I totally got my hands and table) so this isn’t one for the Sharpies.
I’ve used bic washable pens for this particular activity but the crayola washable markers are also ones that I use a lot .
I’ve tried to use colours which match in with the same one that you might see in the Northern Lights themselves so obviously different shades of blue as well as greens and purples.
This is a really good excuse to look at some pictures of the lights with your child and see what shades they notice.
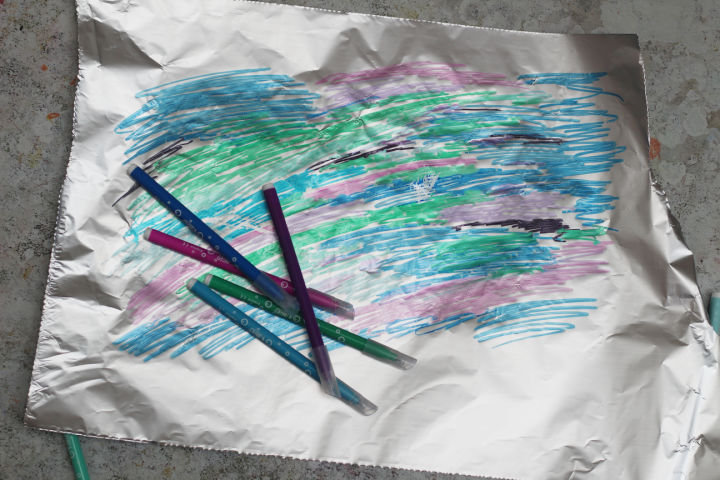
One of the nice things about this activity is that you really do need to scribble over the foil a lot, you want as much of it covered as is possible to reduce your chances of white patches on your art. For this reason I think it’s pretty accessible to younger kids who are pretty much experts at scribbling!
Hold your paper or cardstock carefully above your coloured in area to make sure that you’ve coloured enough foil to cover your paper.
Next you need to grab your spray bottle, this should be filled with some water. You can buy spray bottles online if you don’t already have one but it’s worth having a look around the house for ones you can safely repurpose too – mine used to be for a skin toner.
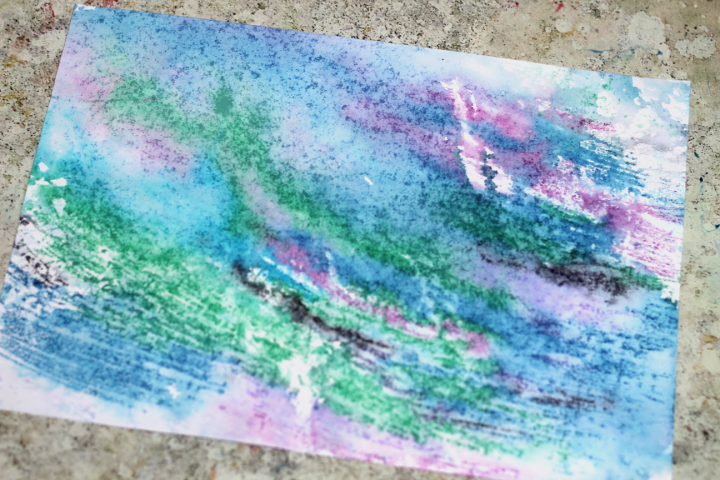
Spray your water all over your foil. I’ve used less water in the landscape picture and as you might be able to see in the final image the colours don’t look quite so fluid, you can see a bit of the colouring lines that have copied over.
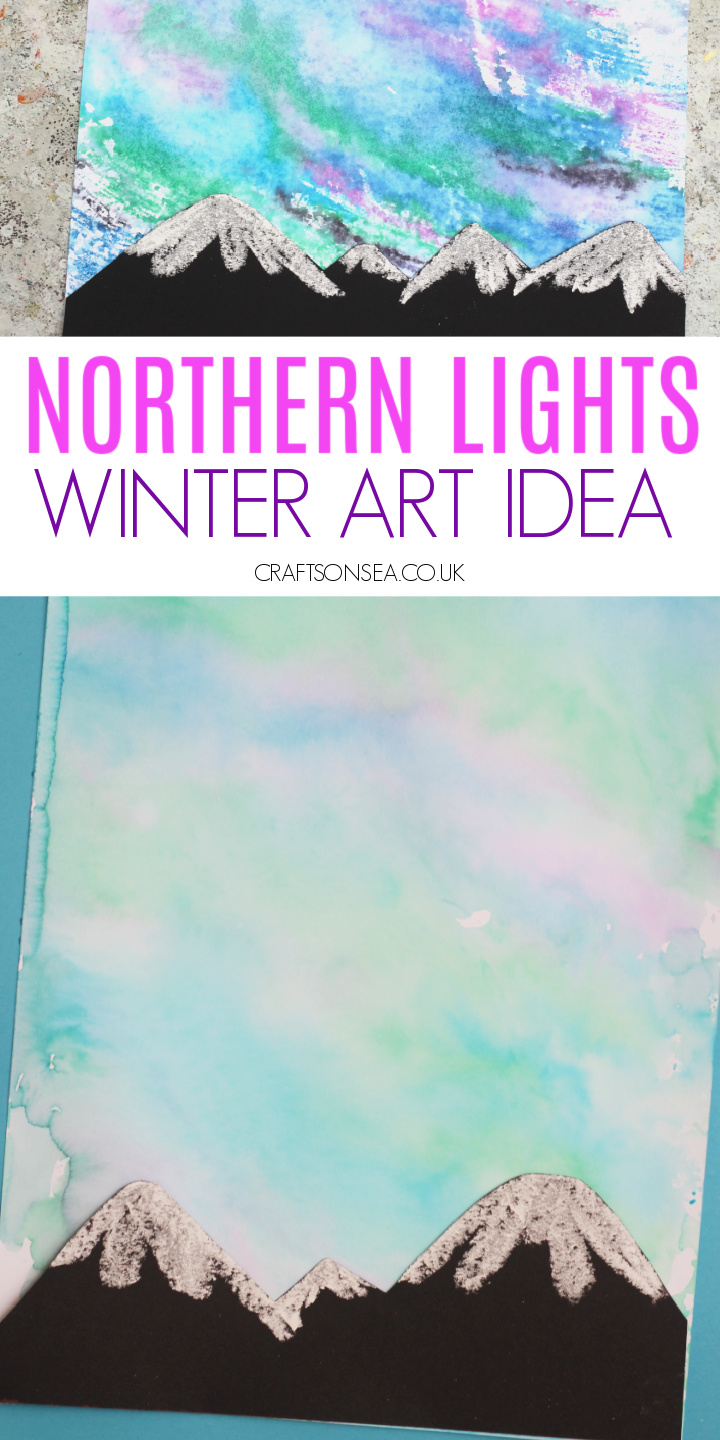
In the vertical craft the colours have blended a lot more as the pen ink becomes watercolors, however you might be able to notice a bit of a drip down one side from there being so much water and ink. There was also more ink left over in the foil afterwards so it made this potentially more messy.
Ultimately how much you spray your colouring is a bit hit or miss but I think that one of the nice things about this craft too is that you don’t know exactly how it will turn out, much like the Norther Lights themselves.
Place your paper or cardstock down on the wet foil, run the back of the paper to ensure that it all gets covered wit the wet ink and then lift the paper back up.
If you do make your art and then decide you want you colours a bit more liquidy you could always give the foil a bit more of a spray in that area and then pop your paper down again but do be mindful that this might cause the different colours to overlay on your paper. Your call.
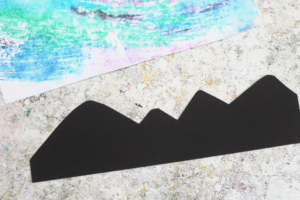
Put your paper aside and let’s get started on the mountain range, this part can be adapted if you like, see the suggestions below.
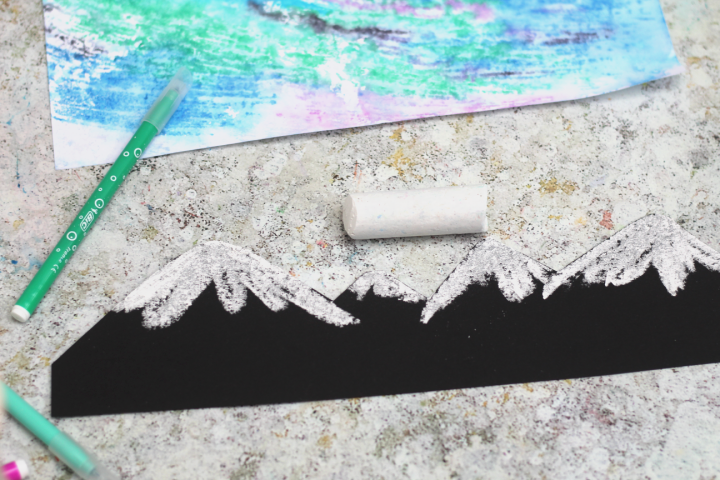
Make sure that your black construction paper or cardstock is the same width as your paper and then using a pencil draw your mountain range and cut it out.
If you can see pencil marks then just turn the paper over. You could of course just cut the shapes out freehand but I found this way less stressful.
Using a white piece of chalk, colour in the tops of the mountains to create your snowy mountains and then blow away any excess dust.
If you don’t have any chalk then a white pastel or chalk pen should also work. Once your paper is dry you can then glue this on to the bottom of the page.
Ideas For Adapting This Activity
If cutting out one long mountain shape for the bottom of your art is a bit tricky for your child why not get them to do individual triangle shapes and layer these onto the bottom of your page instead. These would require only straight cuts into the paper so would be much easier for younger kids starting to use scissors.
I’ve used black construction paper to make the outline of my mountains but you could change this to green paper and do tree shapes instead. Green paper is often easier to find especially if you have any scrap paper or you could even have a look through old magazines for bits to cut out. Again this would be good to make use using triangle shapes for your trees.
Instead of drawing a mountain range or group of trees your could just do a black strip for the ground and maybe cut out a tree shape to go at the side, a Christmas tree shape might look nice.
More Winter Art Ideas
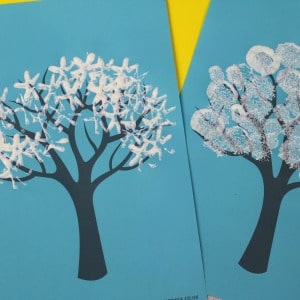
Our winter tree art ideas are popular each year and gives suggestions for ways to create snow covered trees using our free template.
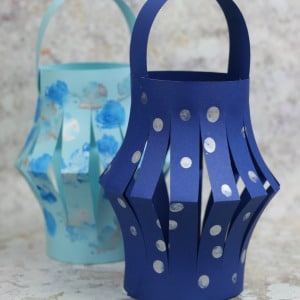
Fed up with the dark? Make and decorate some winter lanterns following our tutorial.
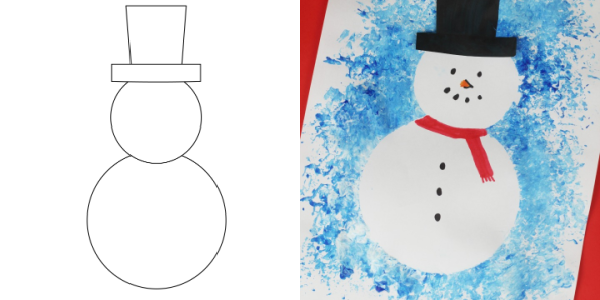
Another activity that uses one of our free templates is this snowman resist art idea that’s perfect for winter.
Northern Lights Winter Art Project
Equipment
- Scissors
- Glue
- Pencil
- Washable pens
- Kitchen foil
- White chalk
- Water spray
- Pencil (optional)
Materials
- White paper or cardstock
- Black paper or card
Instructions
- Get a piece of kitchen foil and check that it is larger than your white paper.

- Colour in the foil using your marker pens.
- Spray the foil with water.
- Place your paper onto the wet foil and then put it aside to dry.
- Meanwhile cut the shape of your mountain range out of your black paper or cardstock. You may want to draw this in pencil first.
- Use white chalk to dray snow on the top of your mountains.
- Once your now coloured paper is dry, glue your mountain range onto the bottom of it.
Notes
Fun, easy project. Just don’t over spray the water.
These were easy to make and they turned out beautiful! My mom came by when we were making these and after she saw how they turned out, she asked the kids if they would make one for her fridge. They were happy to!
So clever and comes out so cool. Will use this for underwater scene as well.