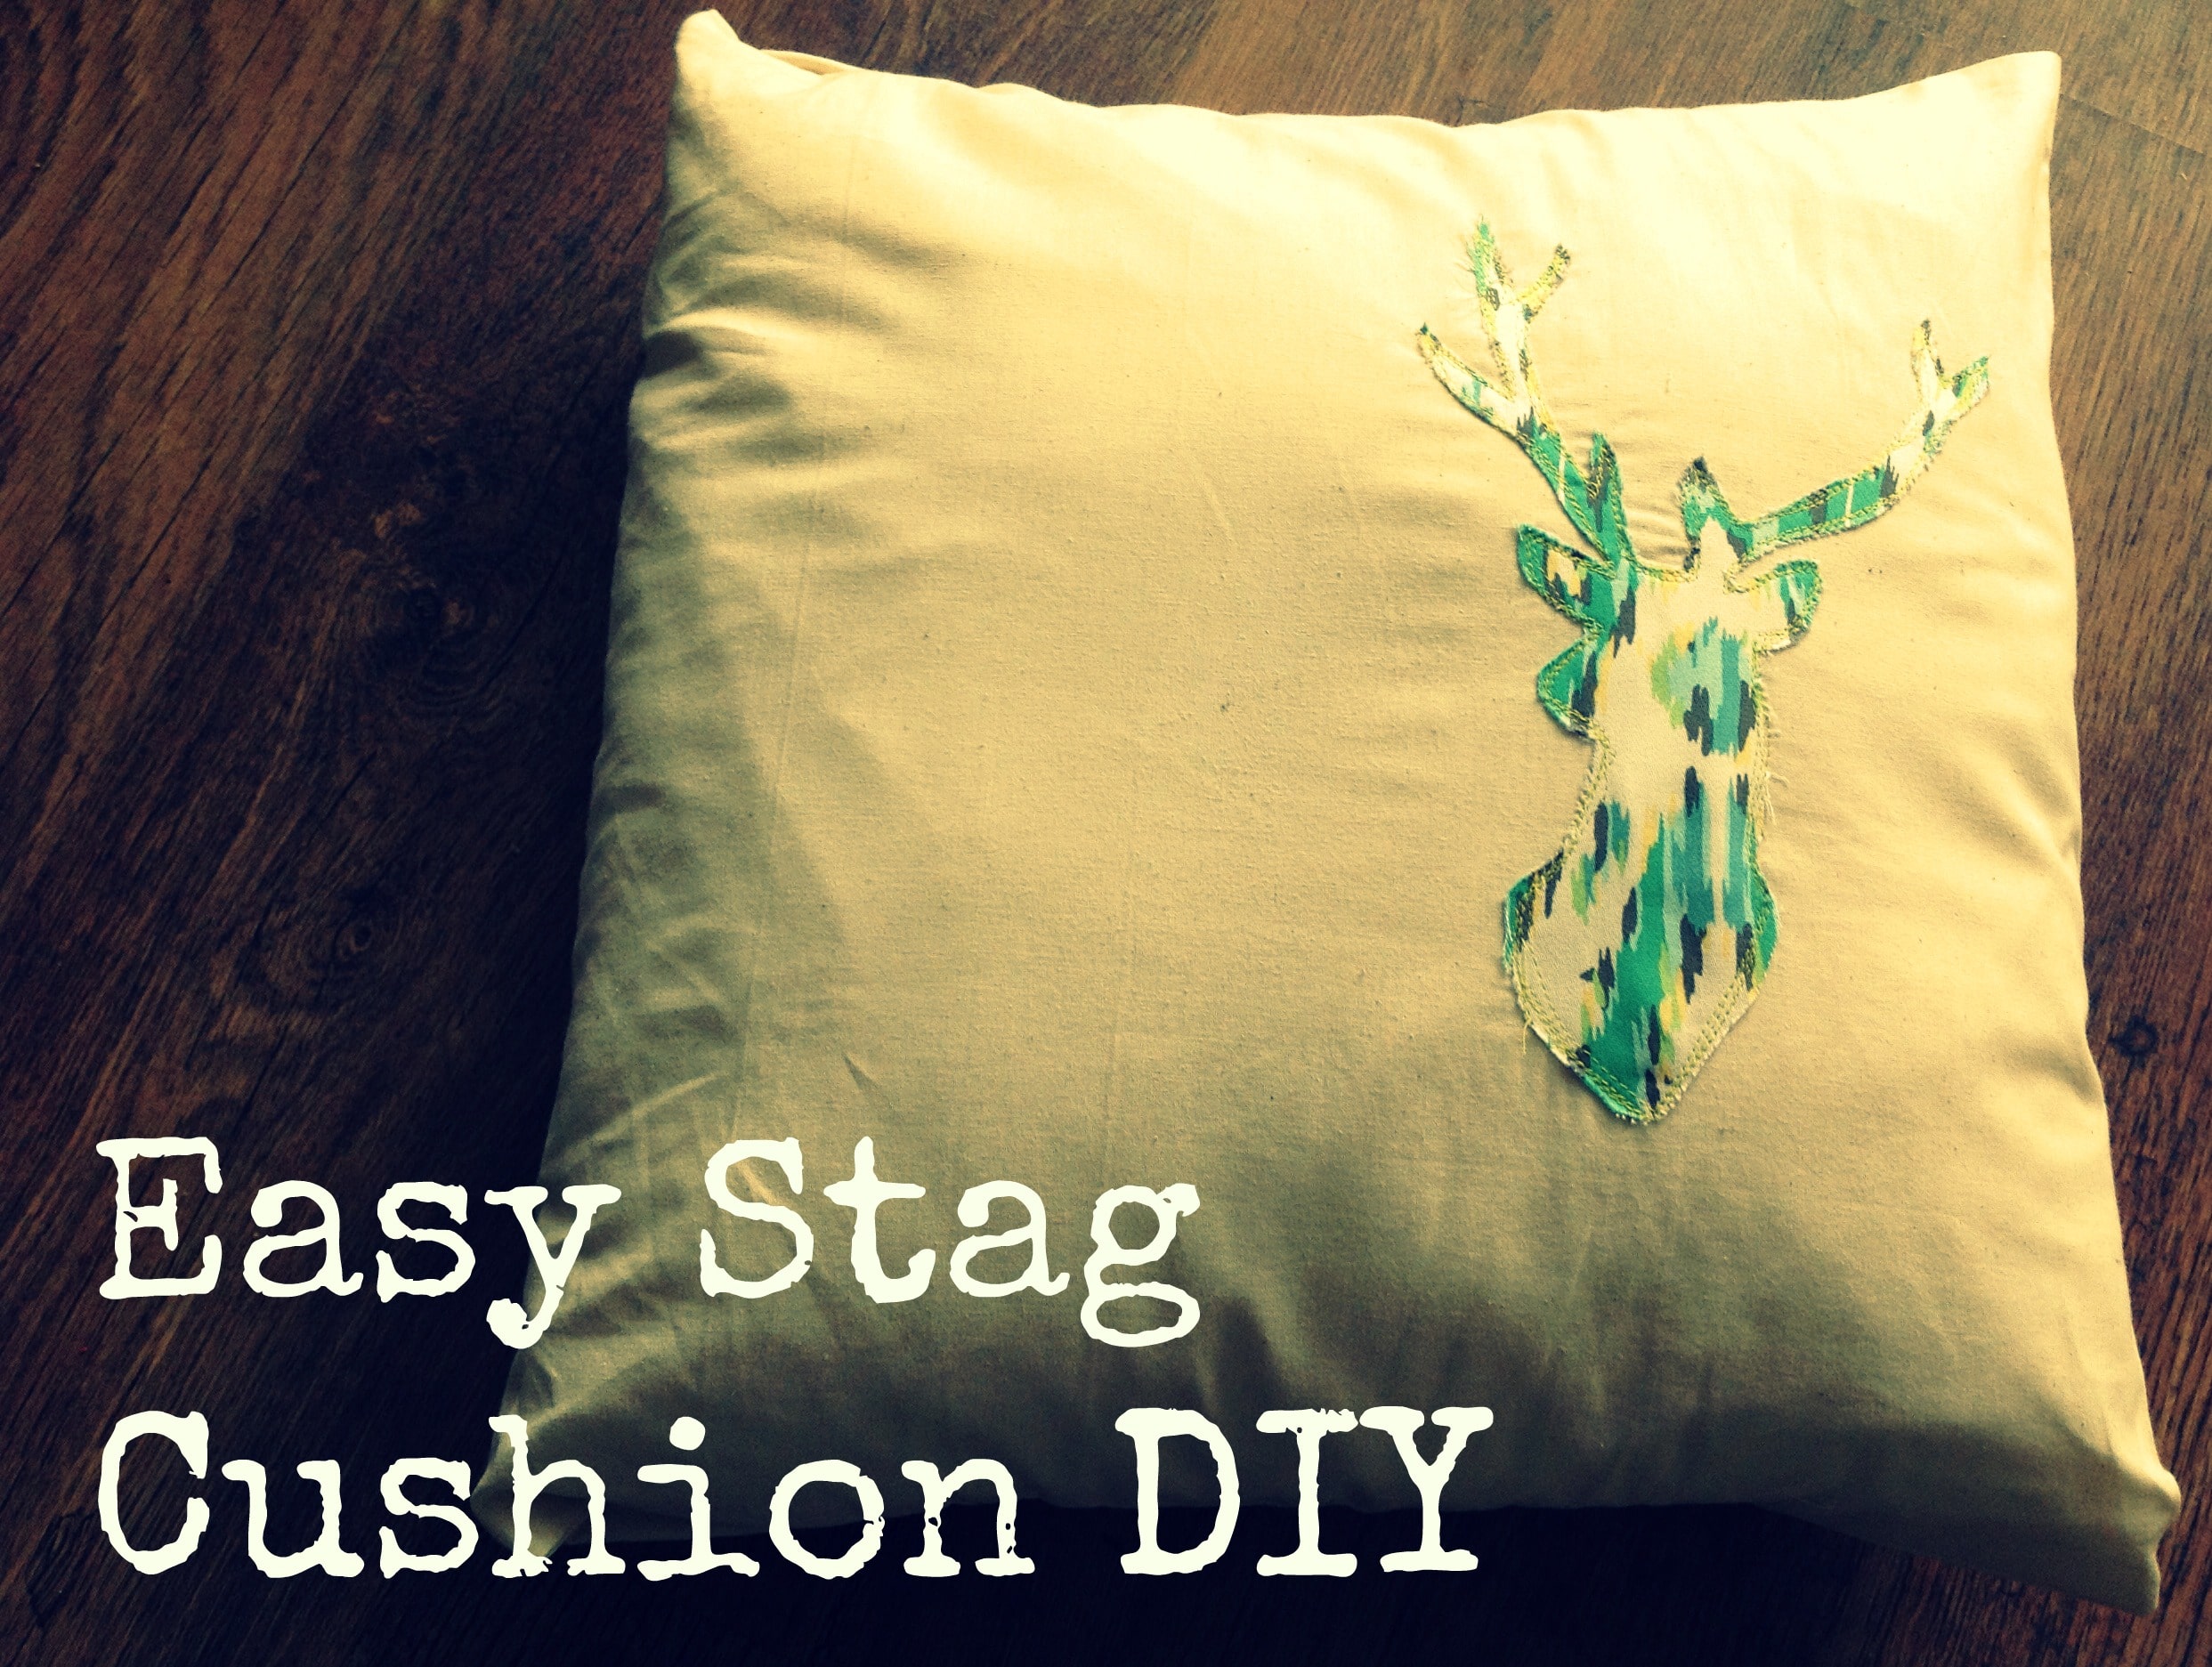
 I know, I’m having somewhat of a sewing renaissance here at the moment. The idea for this stags head cushion tutorial came to me the other day and I knew straight away that I had to make it!
You can view this tutorial in one of two ways, if you follow just the instructions fom making an envelope cushion and ignore all the stag bits then I promise, even as a beginner you can get this done in under an hour. The instructions come from what I learnt at The Make It Room the other week and my first attempt was done in no time at all. If you want to do the stag too it will probably take you about an hour and a half. I did mean to time it but…umm…I met up with the family and had lunch in the middle so kinda forgot. Sorry about that. The instructions are as follows.
What You'll Find on This Page
Before you start:
Iron all your material. I know. Sorry. For a 30 cm cushion you will need 30cm x 110cm material, about 40cm x 140cm for a 40cm cushion and 50cm x 180cm for a 50cm cushion. I found a 50cm cushion because I hate measuring things and I’d bought half a meter! You will also need material for your stag’s head, I used some rather gorgeous stuff from the lovely Amy Butler. If you are bothered about fraying (I wasn’t because I rather like that look) then you could use felt or I think it’s called interfacing? The material you iron on to make material stronger.
 How to make your Stags Head Cushion:

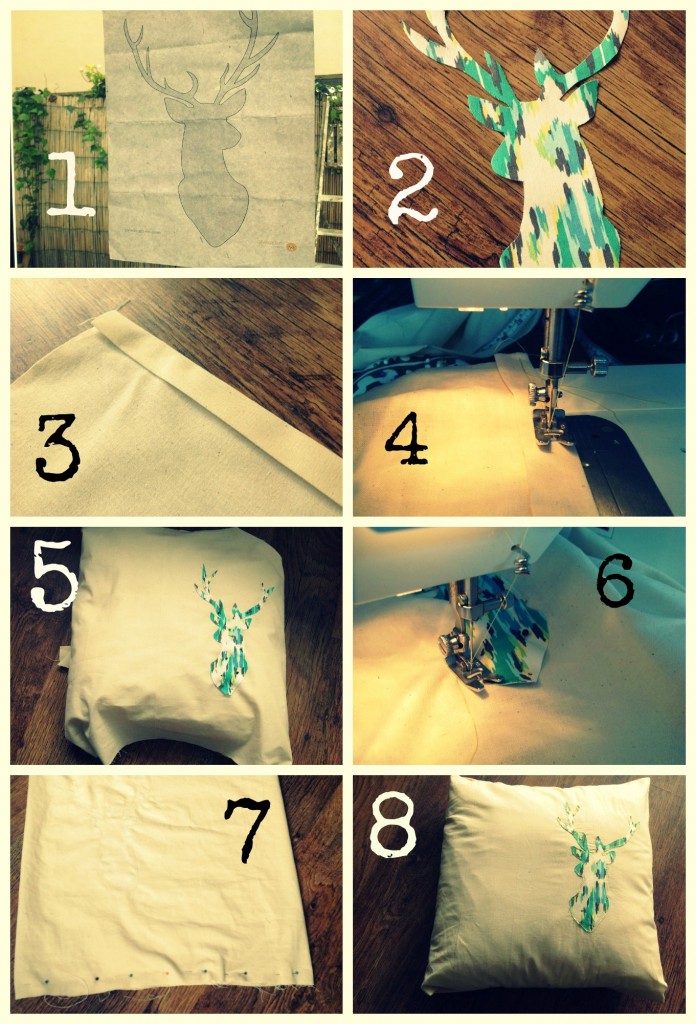
1.Find a nice template of a stag. Tape it on your window, tape your fancy material on top and trace round the pattern on the back of your material.
2. Cut your stags head out.
3. Fold over a seam a couple of centimeters wide at the short end of your cushion cover fabric and then fold over again to prevent this fraying. Iron this down. I know. More ironing. Keep with me though as it will save you hassle in the long run.
4. Sew down the edges you have just ironed. See, you didn’t need to faff with pins! Don’t forget to do a few back stitches at each end (start sewing in the wrong direction, lift your presser foot, turn the material 180 degrees, sew the rest, turn, sew back a few stitches)
5. Wrap your cushion cover material loosely around your cushion. Decide where you want your stags head to go and pin it in place. I would really recommend at this point that you do not put it in the middle as if your sewing goes anything less than 100% perfect it will look wonky and you will be ‘not best pleased’. Better to go for in the corner, eh?!
6. Be brave now and sew your stags head onto the cushion. Start slowly, lift the presser foot whenever you need to, don’t worry if you go a bit over or under the material. The look I was going for here was something a bit like what Poppy Treffry does with freehand embroidery. I went round my stag four times. This helps stop it from fraying too much and I think that gives it part of it’s charm. I back stitched at the end and the beggining.
7. Turn your cover inside out and wrap it around your cushion, ensuring the stags head is where you want it to be. Pin one the bottom side closed, take out your cushion and pin closed the top half. Sew both ends, about 2 cm from the edges. Don’t forget to back stitch at both ends. Turn your cushion back the right way and trim away all loose threads. Iron. Yes, I know, but are you ever going to iron it again? Nope. So do it now so it will look nice on your sofa.
8. Stuff cushion into the cushion cover, feel incredibly impressed with your sewing (and ironing) skills. Relax on sofa with new cushion, cup of tea and at least two chocolate hob-nobs.
Good luck! I would love to see any attempts that anyone makes of this, do email, tweet or facebook me a picture!
You may also like:
It looks fabulous, thanks for the mention Kate xx
can’t get enough of stags….they are very ‘now’
Also very much loving stags, it was the only option!!
I am so pleased that you finally managed it! I love the material that you have made the stag from – very unusual. I am looking forward to more tutorials like this 🙂
Thank you 😀 Am getting some ideas together for more tutorials to do, I’ve really enjoyed the last couple!
good tip about not trying to centre the stag’s head!!
Great tips on how to cut out a shape – iIm rubbish at drawing and not technologically talented enough to print onto fabric or anything so this will be a great way for me to use more intricate shapes on my cushion covers. Thanks!
I love the window method lightbox, that’s the one I use too 🙂
Jan x
Yep, much cheaper than a proper light box too!
I love the way your new pillow turned out. Don’t feel too bad about forgetting where you put things – it happens to me ALL the time. Hope you are having a great week!
Thank you 🙂 And sadly I am rather used to loosing things!!
It looks gorgeous, very ‘on trend’!
Would love to join in! Off to have a look now 🙂
love love love! Really can’t be doing with stag heads on the wall but on a cushion…? Fabulous!
Oh, love anything with stags on! Have been wanting to try this for a while. Now officially on to make list! #pintorials