After realising with my first child quite how long teething lasted, by the time I was pregnant with my second I thought it would be sensible to work out how to make dribble bibs! I like an easy craft project and as these simple dribble bibs are so useful to have on hand it seemed silly not to give it a try. Of course, there is nothing wrong at all with just buying everything, but this dribble bib was so stupidly quick and easy to make it seemed almost silly not to do it. Plus you get to use a hammer on a sewing project, which is always a good thing. And you get to look like one of those mums who is On Top Of Everything which is always a bonus!
How to make a dribble bib
For this this you will need, some cute cotton fabric, some fleece to use as the backing (get the thinnest you can), some poppers (yes, you can get the sew on ones which are cheaper but then you have to hand sew them and you don’t get to use a hammer), a hammer, some baking paper or some such to make a template with. I always recommend that you iron your fabric before you start. I hate ironing (did you see my last post?! Do you blame me?!) but it does make life easier in the long run.
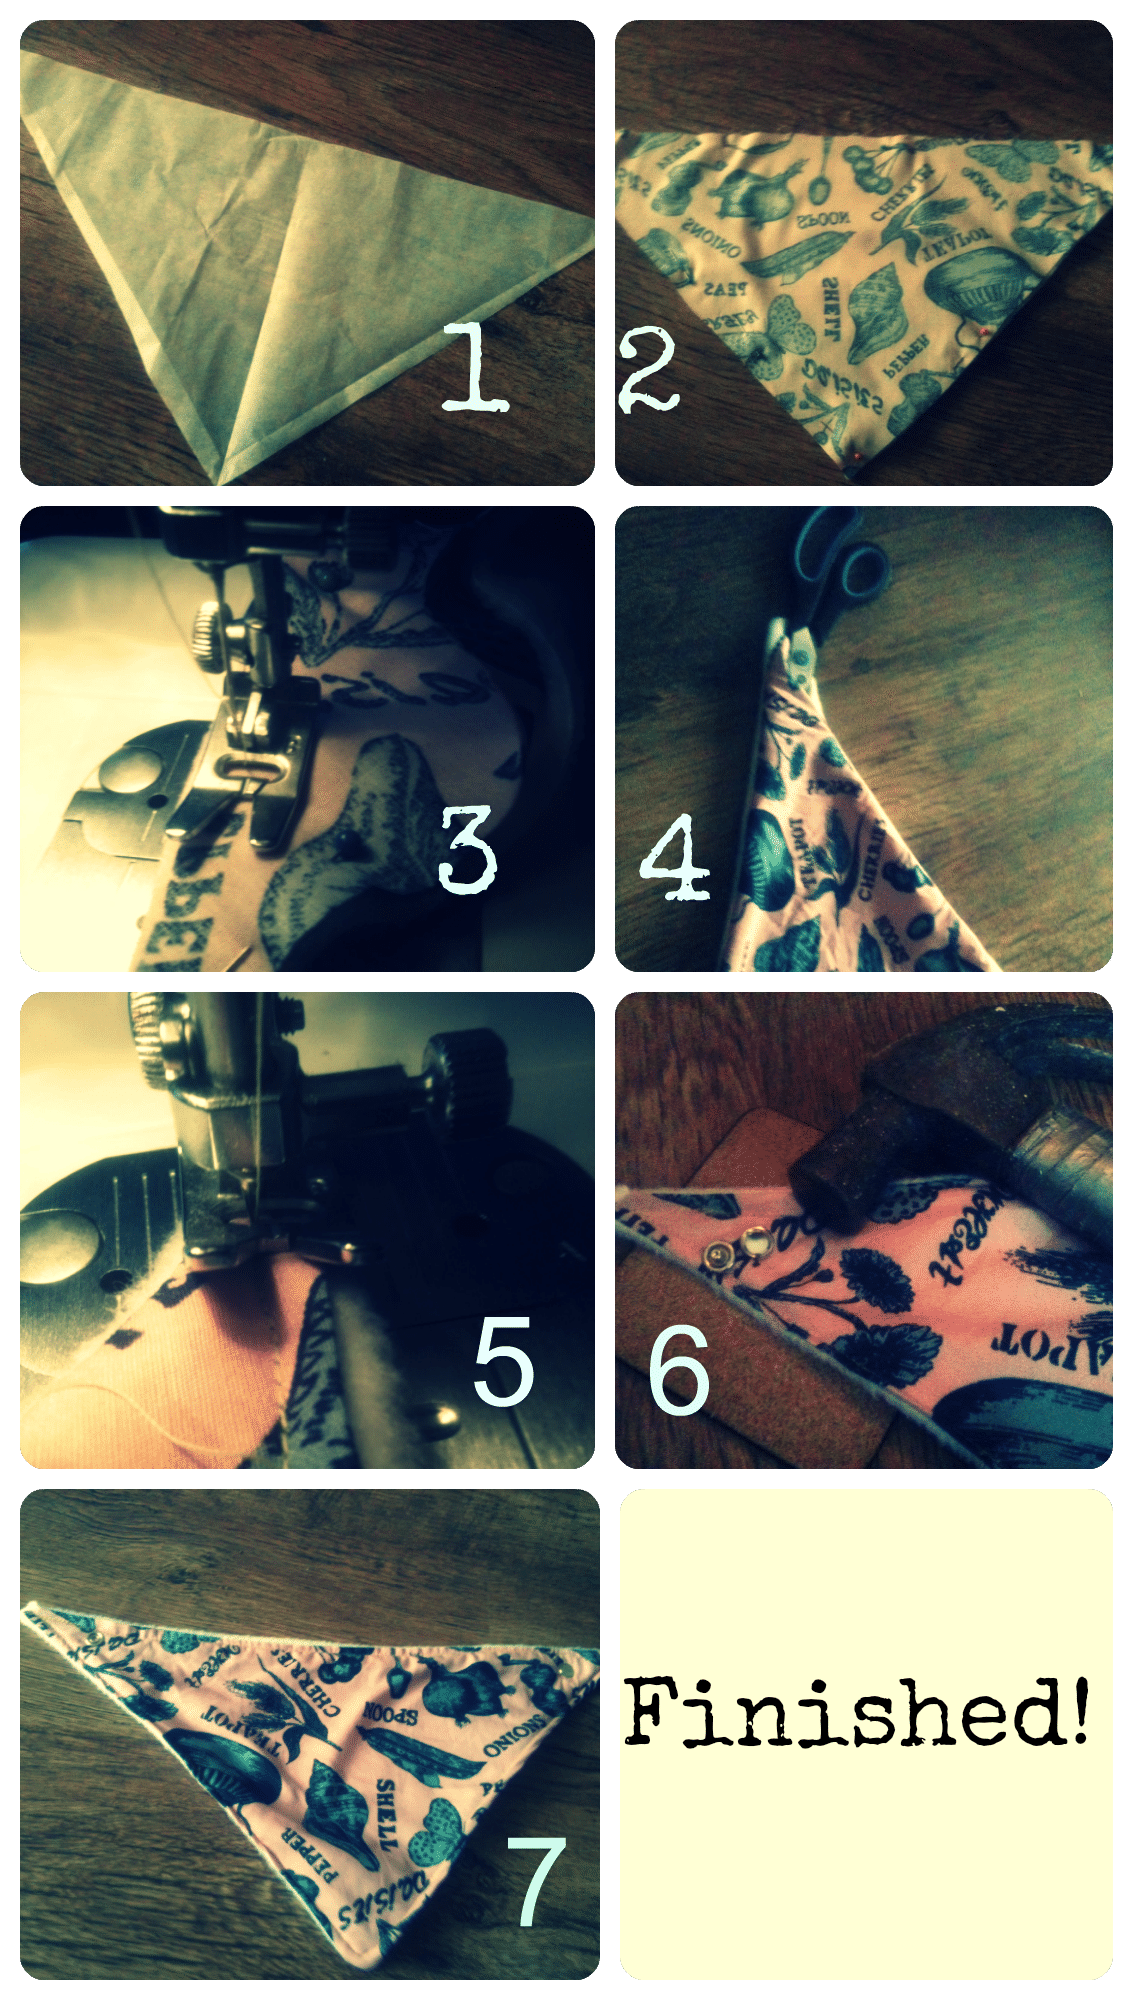 1. Make your template. I based mine on a (now utterly vile) dribble bib that The Toddler had used. It was 48cm wide and 23cm from top to bottom. You should easily be able to join these up to make a triangle!
2. Pin the nice side of your fabric so it’s facing the fleece, attach the template, cut round it and then remove the template keeping your two bits of fabric pinned together.
3. Sew the two pieces of fabric together leaving a gap of about 10cm where you will turn it inside out later. I did this in one of the corners where I would be putting a popper to ensure it wouldn’t show. Don’t forget to backstitch (do a few stitches in the opposite direction) when you start and finish to hold your sewing in place.
4) Turn your bib through the right way through the hole you left, so the nice side of the fabric is showing. Use scissors or a pencil to get the corners out properly.
5. Starting in a corner where you will have a popper, sew all around the outside of your bib. This will close the hole you left and make it all look uniform. Don’t forget your backstitching at the beginning and end. Cut off all loose threads.
6. Yay, get your hammer out! Hit those studs into place, you want them to be about 34cm apart for a baby or 37 for a dribbley toddler (anyone know when teething ends?!)
7. Iron it again, because you want it to look nice and you’ll never bother once you’ve put all your stuff away. Put feet up with tea / shiraz / preggie ladies becks blue, you’ve earnt it!
Hope you enjoy making this, it’s super easy and would also make a great present for a friend with a new baby. Do let me know if you make it, I love sharing other people’s makes on Facebook and Twitter!
You may also like:
Fun Sewing Tutorials
- How to make a tag blanket
- How to make a minion finger puppet
- 35+ Cool gifts to sew for kids
- How to make an owl finger puppet
Don’t forget to follow my Sewing, Tutorials and Inspiration board on Pinterest for more ideas
Follow Kate Williams CraftsonSea’s board Sewing. Tutorials. Inspiration. on Pinterest.
Want to make this later? Don’t forget to pin it so you can find the instructions easily!
Super cute and very handy!
Oh will definitely be having a go at this – looks like my kind of project! Lovely post 🙂 x
Yes, highly recommend it and would love to see any pictures you take!!
Like the new design, see you have been busy…. Mines still coming! Don’t get too excited though
Mine took me ten mins once I’d finished faffing!!
Very nice! I need to make some bigger bibs as he is more of a chewer right now and if there is no bib the tshirt is soaked in minutes! I like the dea of getting a hammer out too.oh yeah!
I can’t resist a project with a hammer in it!!
Wow how simple just need to make these for my dribbling grandsons. I am overlooking mine so much quicker .but yes I will hammer the studs kit purchased. Alsoo I am using a super soft towelling much more absorbent than fleece
This looks lovely, especially with that vintage fabric!