Do your kids come home from the beach carrying loads of seashells? I know mine do and to be honest I’m often known to pop a couple in my pocket myself, I normally have no idea what to do with them but I can’t resist pretty things! I had an idea earlier this week about using them to make some kind of seashell decorations and as chance would have it we made these one day and decided to decorate my son’s room in a seaside theme the next day. Room decorations at the ready – boom!
RELATED POSTS: Beach Crafts for Kids
What You'll Find on This Page
Materials
Seashells
Food Colouring (I used yellow and I tend to use liquids rather than the gels as they’re much cheaper)
Half a cup of salt
One cup of flour (should probably be plain, I had none in the house so I used self raising and it was fine)
Half to three quarters of a cup of water
Rolling pin
Star shaped cookie cutter or similar
How to make your seashell decorations
First turn your oven on to 50c. I must admit that ours started a bit higher than that as I’d just used the oven to cook lunch! I just turned it off from a high heat and turned it on again at 50c when I thought it was getting cool.
Put the salt and flour into a bowl. Add the food colouring and then add the water bit by bit until it reaches a consistency you can kneed like bread. Do be careful adding the water, our first batch was a very vibrant yellow however it also got a bit waterlogged due to excitement at pouring!
Once your salt dough has reached a dough like consistency, roll it out to about 1cm thick. Putting some extra flour on the worktop and rolling pin will help this.
You can then cut your star shapes out, I think this was the bit my son liked best!
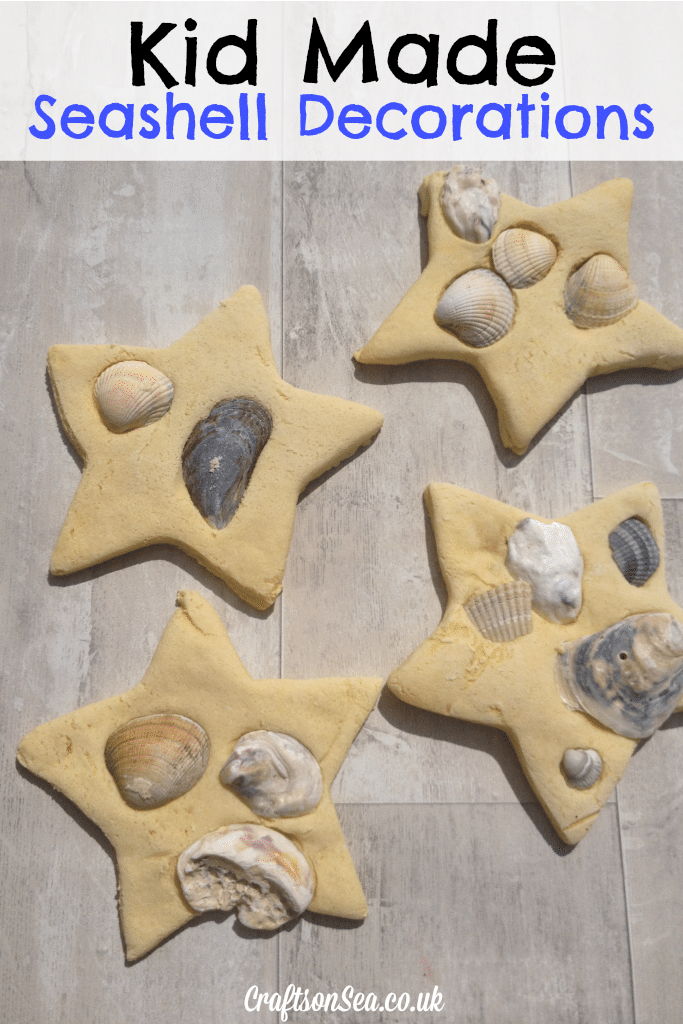
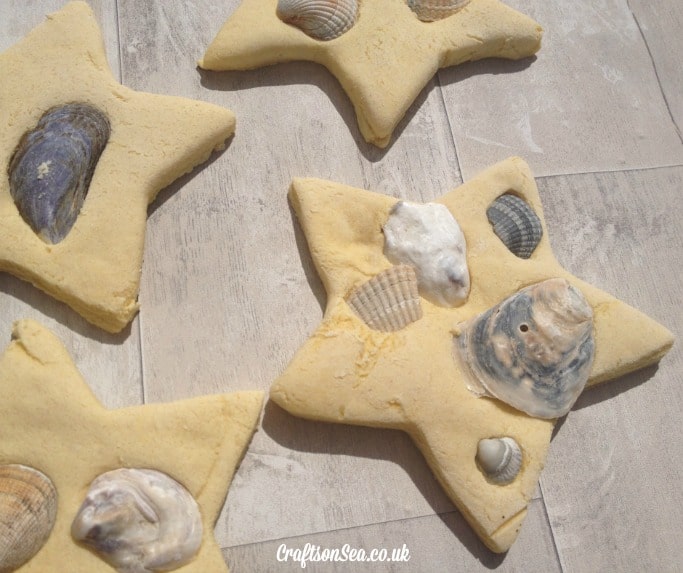
Place your salt dough stars on a lightly floured baking tray and then add your seashells to decorate.

Put in the oven and check every so often until they are dry the whole way through. The time they take to cook will depend on how thick your seashell decorations are but as a guide mine took a few hours. You can apparently leave them out to dry naturally however I’m guessing this would take ages and if your kids are anything like mine the decorations will quickly get lots of fingerprints in them too! I would also advise that after an hour you take them out of the oven and give them a little move around just to make sure that they don’t stick to the tray.
Ta dah! Your seashell decorations are now ready to display! Ours are looking fab at home and I’m looking forwards to sharing more sea crafts for kids with you as we finish decorating my son’s room.
You may also like
Lovely way to use and display all those shells collected. #Pintorials
Thanks Karen x
Such a lovely idea to display seashell!
Fabulous idea, I think we shall make some of these on a rainy day with our shell supplies! 🙂
Attaching a magnet to the back would be a super display for the fridge.
That’s a great idea!