Advert. I’m really excited today to share a project I’ve been working on with eBay.co.uk – called Craft Term!
As a mum of two, I know all too well the excitement of having the kids at home over the holidays, but as much as we go out and have fun there’s always that bit of time at home where we need ‘something’ to do – especially during the February half term where it’s not exactly as easy to spend all day outdoors!
I love buying our craft supplies online as it means I can get exactly what we actually need (no pester power walking round the shops!) and eBay.co.uk’s FAST & FREE delivery shipping service means that you can order what you need today and get it quickly delivered to you for free.
All of these crafts cost less than £10 each to make, making them perfect if you’ like a chilled out but creative day at home with the kids.
Like the crafts I’m sharing today? Make sure you bookmark this page or pin an image so you’ve got them all to hand when you need them and you’re ready for some half term fun.
What You'll Find on This Page
Paper Plate Llama
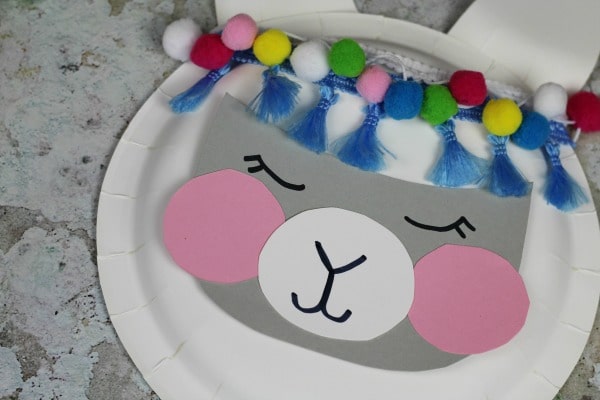
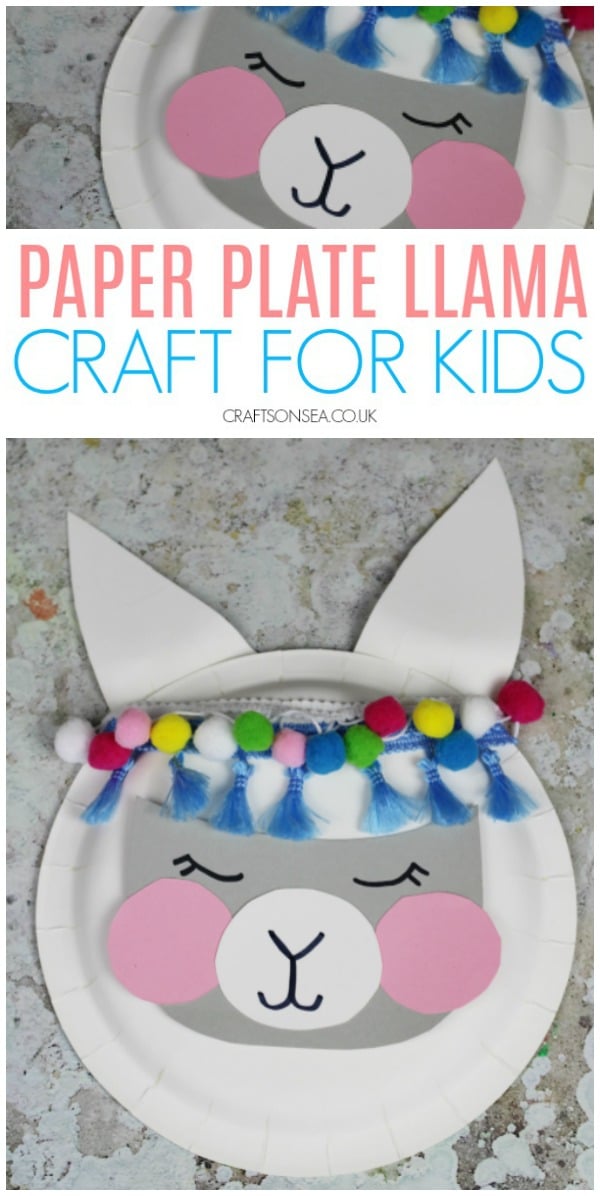
This paper plate llama craft is my new favourite thing, as it’s just so cute and I love the pom poms and tassel trims from eBay.co.uk.
To make this craft, you will need two paper plates, one will be used for your llama’s face and the second will be used to cut out the shapes of your llama’s ears and the white middle part of their face.
Cut one plate into two pointy ear shapes and a circular shape for the llama’s nose Stick the ears to the back of your llama’s face using some Sellotape and put the other part aside for later.
Next you need to make the middle grey part of your llama’s face. I’ve cut this out from some grey card and glued it on, but you could draw it on with felt tip pens too.
Cut out some circles from pink card for the llama’s cheeks and glue those onto your llama’s face and the white part you cut out from your paper plate earlier, and then you’re ready to decorate.
Start by drawing on your llama’s eye’s, nose and mouth using a black pen and then it’s time to make your llama look super cheerful with some pom poms and tassels!
Cut both of these to the length you would like and then secure them to the back of your paper plate using some Sellotape, layering them up on the front of your llama’s face for a cute craft anyone would be proud of.
Paper Plate Movable Fish Craft
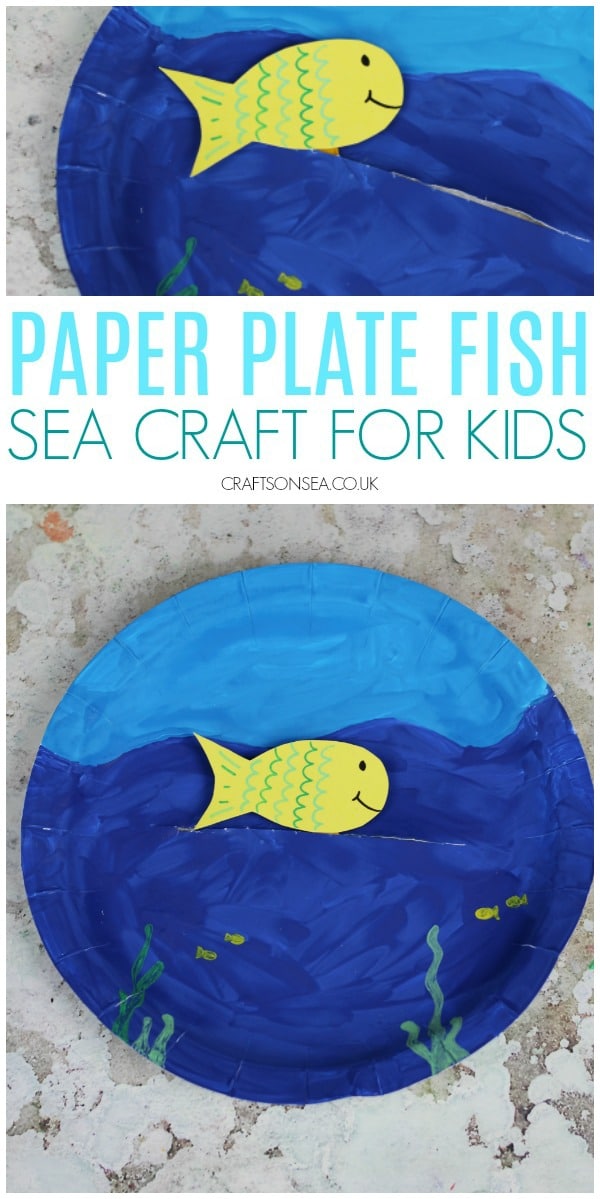
I’ve made this movable paper plate craft with an ocean theme, but it’s an easy idea to adapt to your kids interests – superheroes, princesses and animals have always been very popular in our home!
Start by decorating a paper plate with the main background of your scene – I’ve used dark blue paint for the sea itself and a lighter blue paint for the sky.
Once your scene is dry, you will need to cut a line through the middle.
You want to make sure that this doesn’t actually cut across either edge of your paper plate, so make a hole in the plate by pushing a pencil or scissors through it into some playdough and then cut a line across (again leaving room at the other side).
Add as many decorations as you’d would like to your paper plate using card, stickers or pens.
Next up is making your movable puppet. Cut a fish shape out of card and then stick it onto a craft stick using Sellotape.
Pass the stick through the slit in your paper plate and holding onto the back you can now move your fish around, letting them go on their own little adventure in the ocean.
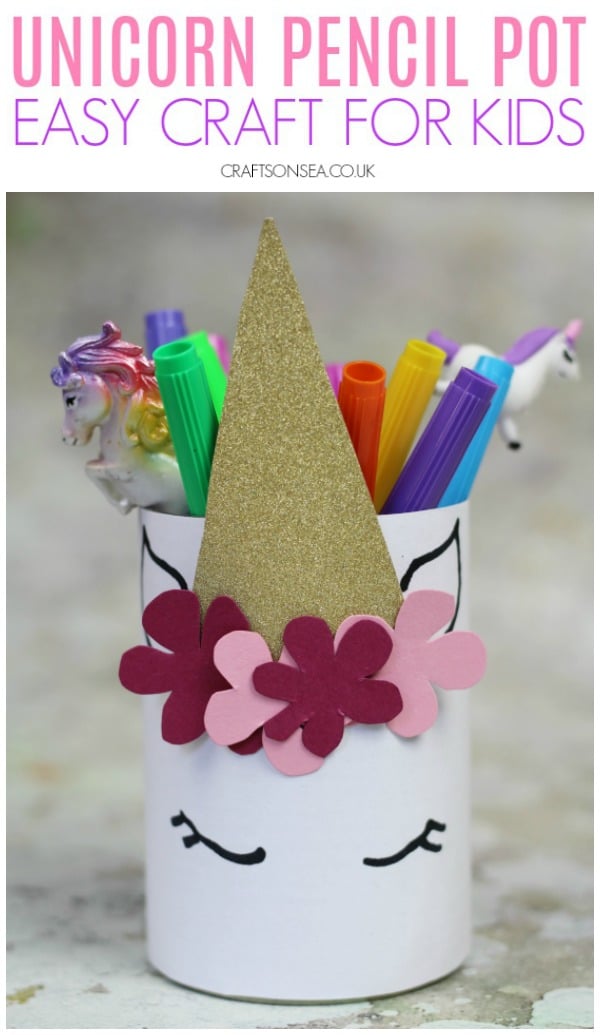
Unicorn Pencil Pot
This unicorn pencil pot is super cute and it’s also super easy to make with a quick rummage around your recycling bin and a couple of supplies picked up on eBay.co.uk. Start by finding an old tin can, cleaning it and removing any dirt or mess, obviously check to make sure it isn’t too sharp to use – this is a craft for older kids rather than very young ones.
Next put the tin can onto a piece of plain white paper, so you can measure the height of it and then cut to size so it will fit around your tin can, secure it in place with a piece of Sellotape.
Next cut out your unicorn’s horn! I’ve used glitter card for this, but metallic or plain card would work well too. Sticking things onto curved surfaces can be a bit of a pain as they can slide off, so for sticking these on I use double sided sticky tape.
To decorate the bottom of your unicorn’s horn you can cut flowers out of coloured card and stick these on too or use some cute flower shaped stickers.
Finally, draw on your unicorn’s eyes and ears and it’s ready to pop all of your best pens in.
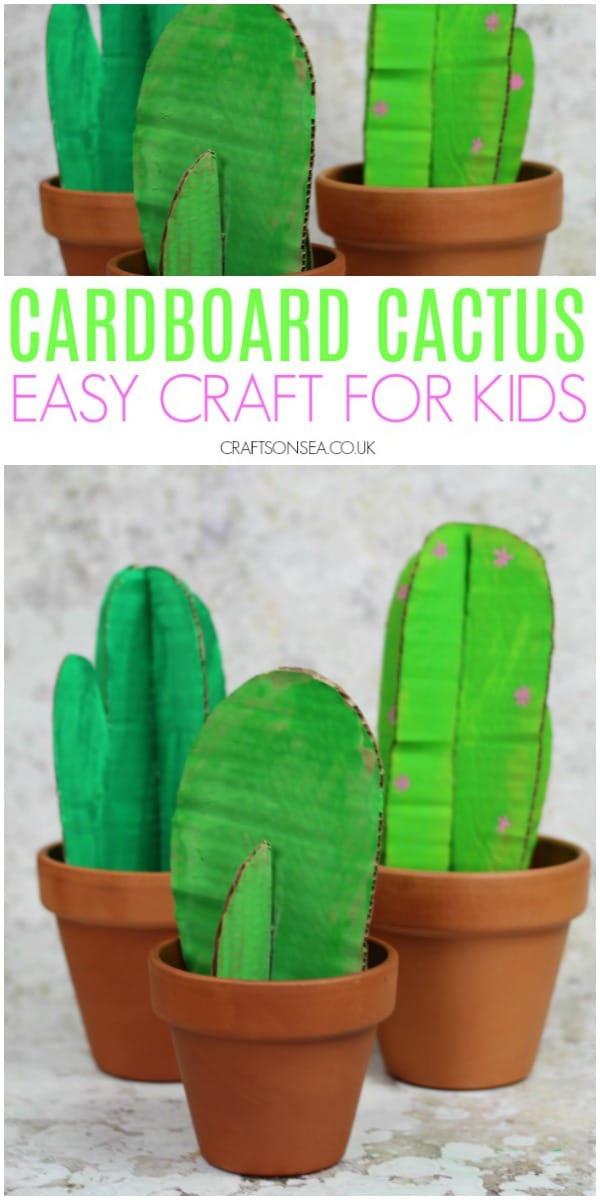
Cardboard Cactus
My kids love cactus’s – but not the spikes (my son put his foot on one during the last school holidays – ouch!) These cardboard ones are a lot safer for curious hands and even the least green fingered of gardeners will be able to keep them alive.
Start by cutting some cactus shapes from cardboard using scissors. This is a great way to get a second use out of any boxes you’ve had from deliveries, or you can often pick them up from supermarkets and garden centres.
For each cactus, you will need to cut out two shapes, making sure that they will fit into some terracotta pots. The two pieces don’t have to match or be exact, which makes them a lot easier to make!
Next paint both sides of your cardboard green and when they have dried cut a slit into the top of one and the bottom of the other. Leaving this until after the paint has dried makes sure that wet paint doesn’t drip down into the cracks and dry there.
Push one part of your cardboard cactus into the other to make a cactus shape and then put it into your terracotta pot – you can always hold these in place with a bit of playdough modelling clay.
Finally, add some pink flowers using pens or stickers and your cardboard cactus is ready for pride of place in your bedroom or front room.
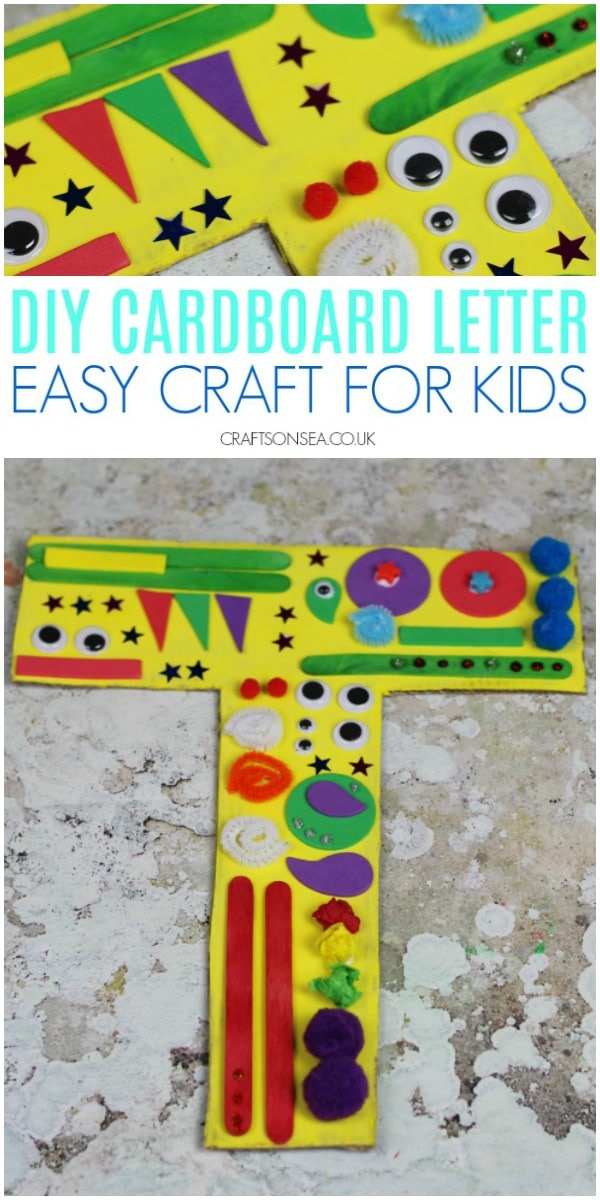
Cardboard Initial
Cardboard initials are a great way to brighten up your kid’s bedroom. I’ve just done one letter but you could do the whole of your child’s name if you wanted!
Start by cutting the initial out of cardboard using some scissors, you might want to draw the letter onto the cardboard first using a pencil, especially if you have a tricky letter! Because you’ll be using a lot of paint, glue and craft materials for this craft, I recommend using thick cardboard rather than a thin cereal packet or similar – you want it to be able to hold the weight.
I’ve painted my letter yellow to make it look a bit more cheerful, but if you just want to get on with decorating this stage isn’t necessary – go with what you think you’ll enjoy the most.
When your cardboard is dry, it’s time for the fun part – decorating your letter with as many cool craft materials as you can! Craft boxes like this one from eBay.co.uk are perfect as they’re full of different fun things, and this craft is a great way to use up some of the contents that you might not have been sure what to do with. When it’s all dry, it’s ready to be displayed.