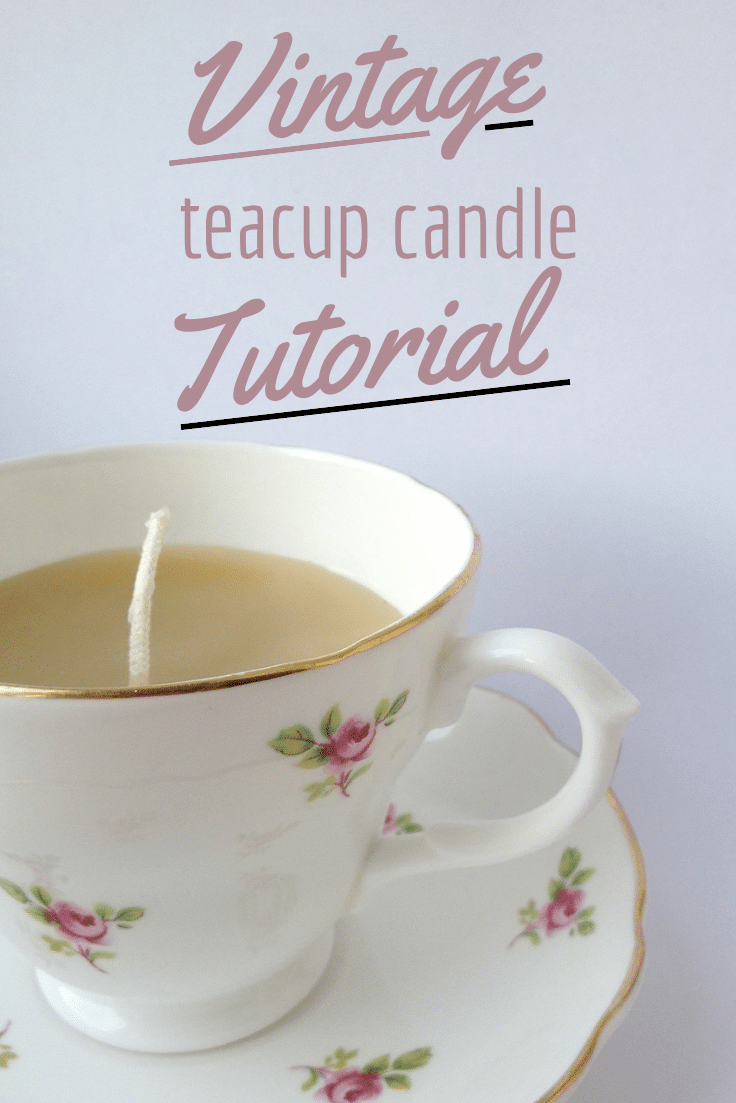
As someone who has a mild addiction to collecting pretty vintage things I’ve found myself with quite a few vintage teacups in the house! As such I’m a big fan of sharing DIY teacup craft ideas here on the blog and these DIY teacup candles are relatively simple to make! Once you’ve got the hang of it you’ll want to make loads and they make great handmade gifts too!

What You'll Find on This Page
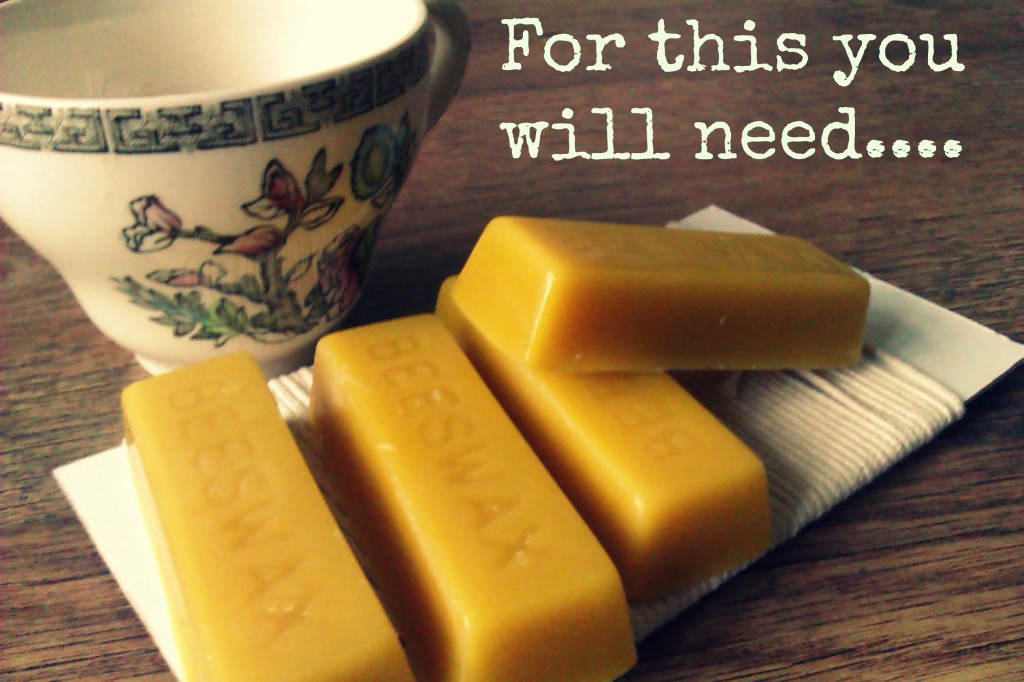
Materials:
You will need, one teacup You will also need some candle wick, I bought this on ebay and some beeswax which I bought from the same seller and which seemed to be the cheapest one out there. For each teacup I found that I needed four blocks of beeswax. I’m sure you could use other kinds of wax, but it looks really cute in the blocks!
How to make your DIY Teacup Candles
Firstly, you need to cut your wick and then wax it. Obviously, I had no idea how to wax my wick (ahem) so I just rubbed it a bit between two blocks of wax. Seemed to do the trick. Put a strip of selotape across the top of your cup, slightly off centre so that you can have some of your wick centered right in the middle. Secure it in place with another bit of selotape. This is so your wick stays there and doesn’t fall into your hot wax, meaning you have to fish it out with your fingers. Make sure that the wick in the bottom of your cup is able to lie a little bit flat so that it will stay in place when you start pouring in the wax.

Next is to heat your wax. Now this is why I am blogging this because the advice I read on the three blogs on this were a bit sketchy on the whole health and safety thing and even more importantly on the cleaning aspects. You need to heat your wax quite hot for it to melt, some people will tell you the exact heat however I do not have any kind of thermometer that I would stick in melting wax so this was no use what so ever to me. Kirstie Allsopp’s bit on the C4 website stated that if the wax gets too hot it can set itself on fire. I don’t know if that’s true or not but I had no real inclination to find out. That site suggests heating some water in a saucepan and then put another saucepan inside that with the wax in it. That’s what I did, being not mega keen on house fires and all that.
When the wax first starts to melt, pour enough into your cup to cover the bottom bit of wick. While you heat the rest of the wax this will cool and help stick the wick into place.
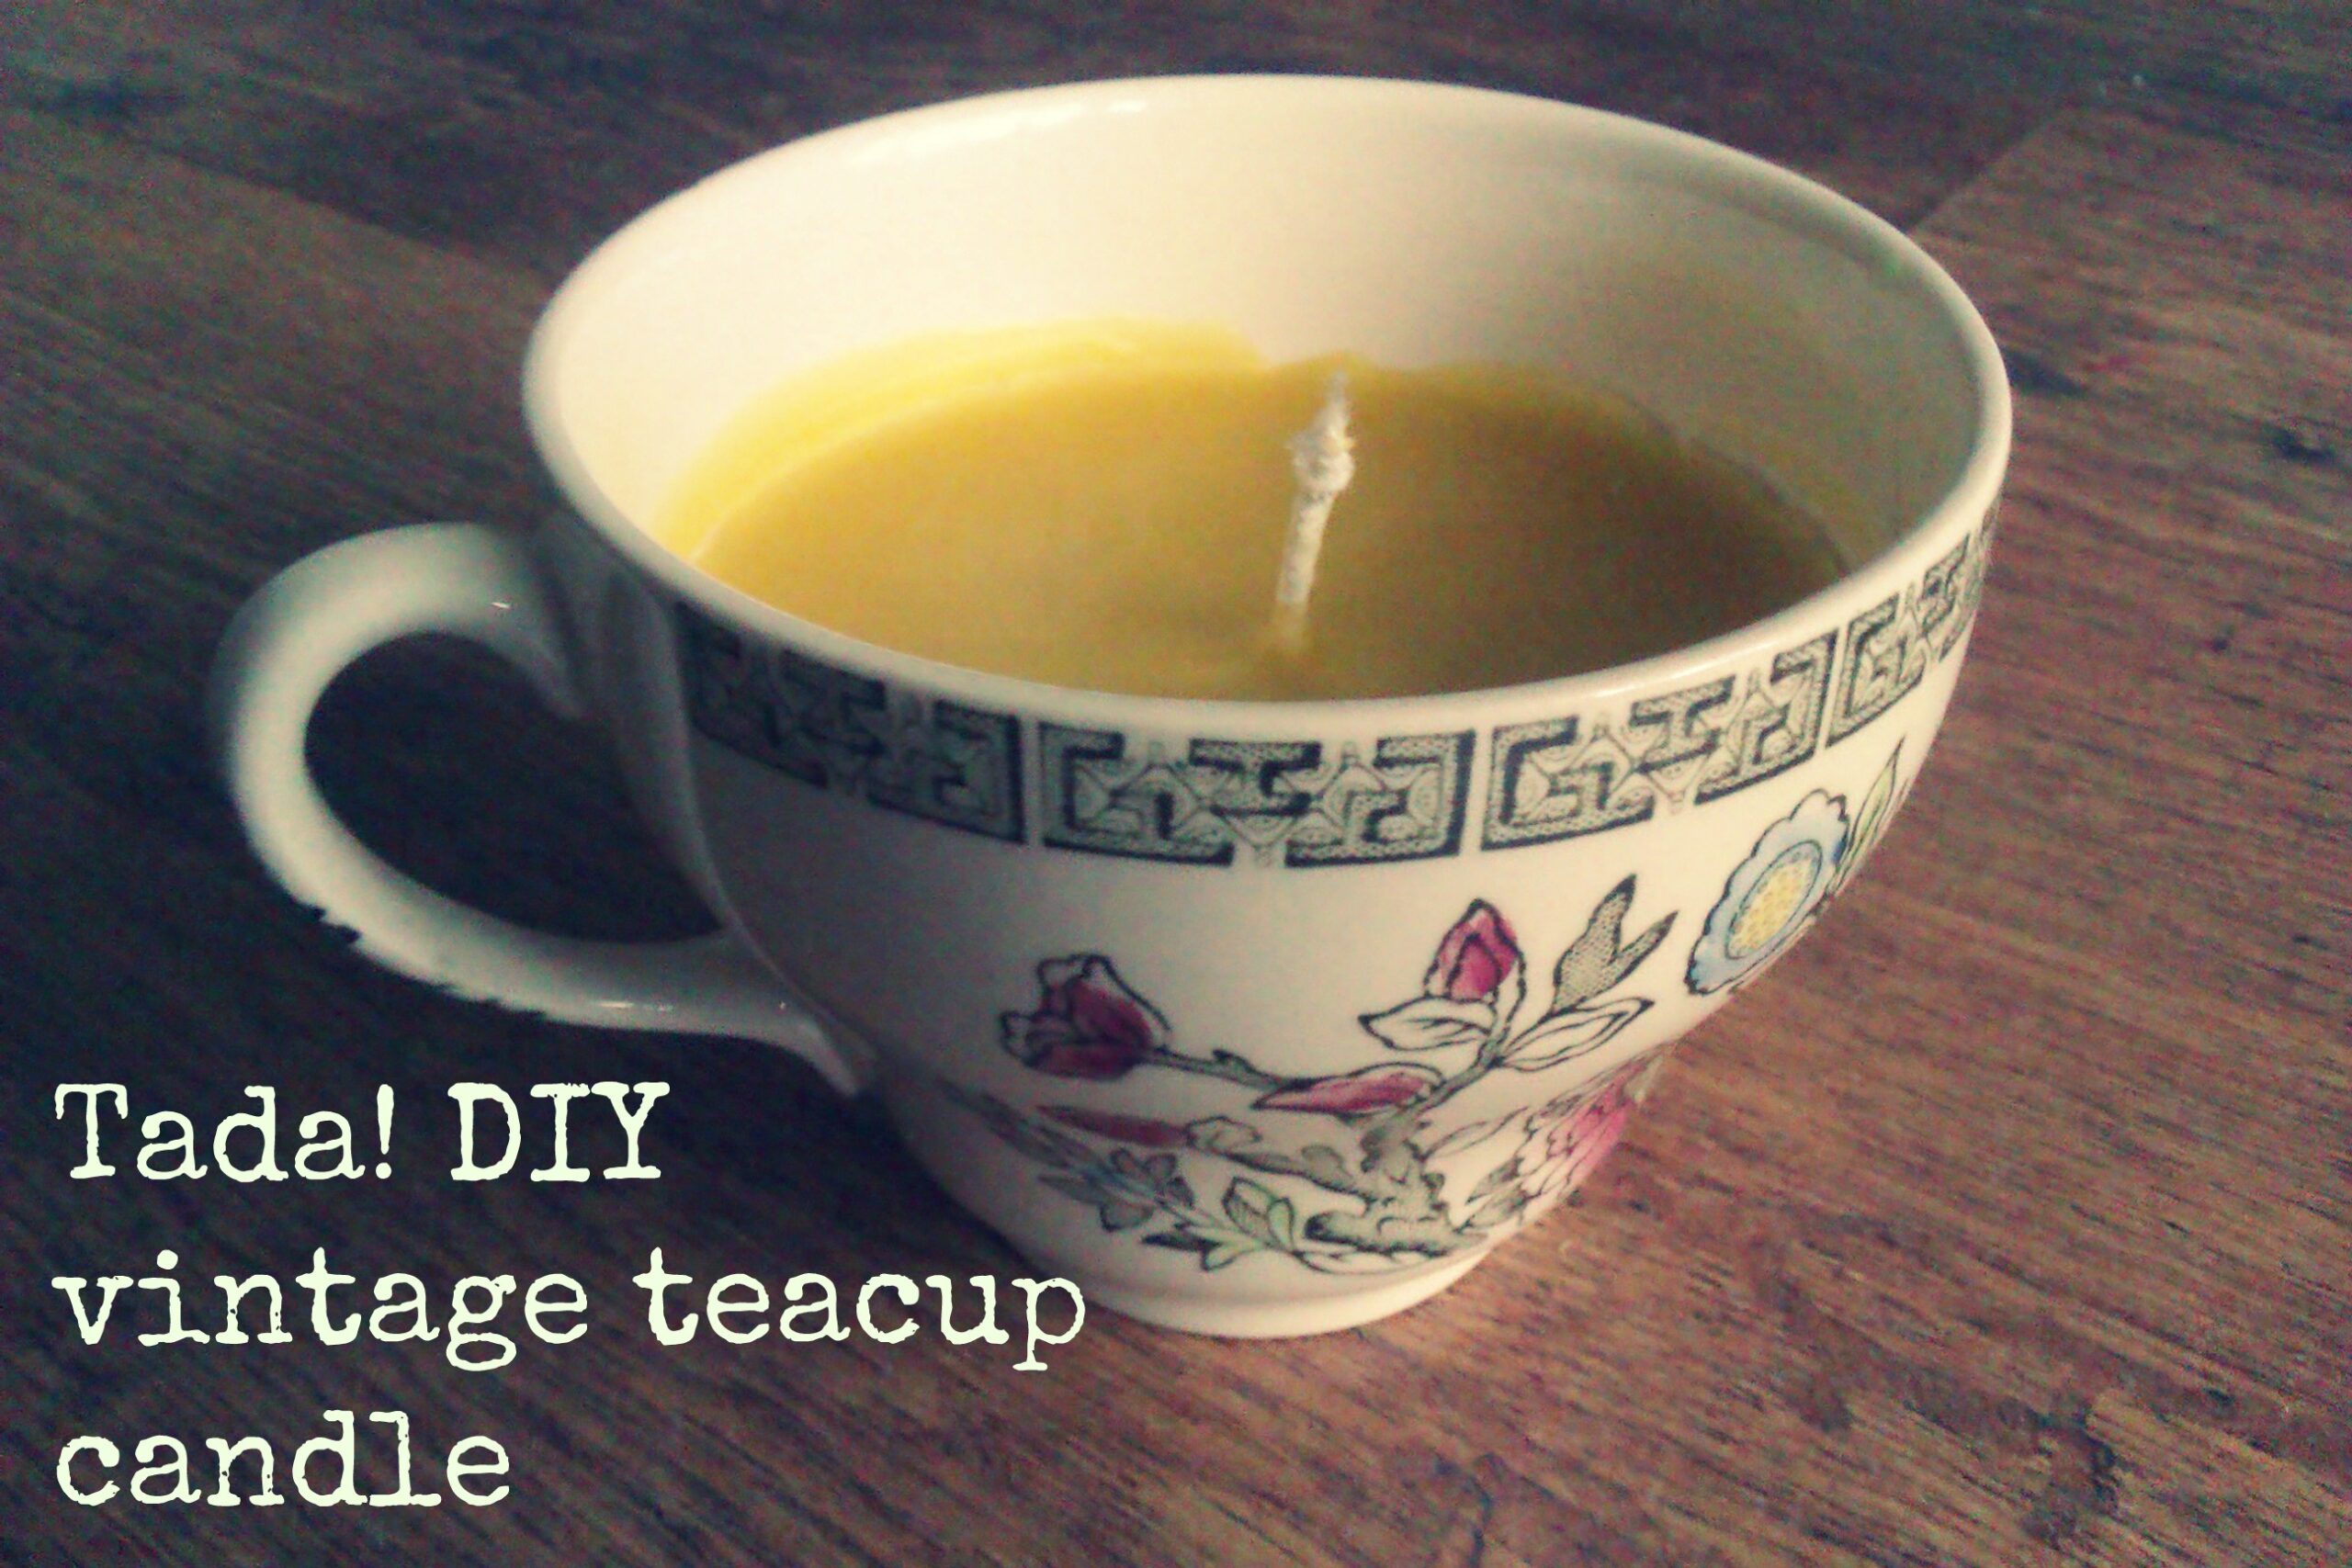
Slowly heat the remainder of your wax and then pour this into your cup. Put somewhere to let it solidify and feel pleased with yourself, your DIY teacup candles are now done!
Now for the not so good news. The washing up. Why does no one else mention this?? That’s why I get a bit fed up with the proper aspirational crafts lifestyle blogs, distinct lack of real life. I bet their cakes never burn either. The wax will solidify in your saucepan pretty quickly so unless you want to chuck yours you need to keep reheating the wax slowly over the heat and then chuck it in the sink and give it a clean. Dry it, check with your fingernail for wax and then do again if needed. Took me four attempts, thought you’d want to know!
I gave this cup to a friend from my old job who left at the same time as me and have ordered some more wax to make one for another friend. These really are easy and cute, let me know if you make one, and I’d love to see any pictures.
You may also like:
Those bees wax blocks do look super cute! I bet it smells gorgeous too.
I have some beeswax sheets my Other Half bought me for Christmas, just need to find the time to make candles with them now!
The cutest gift ever, I love it! X
Very pretty, easy (clean-up aside), and I bet the smell great, I love the sweet smell of natural beeswax
I LOVE this.
Is there any chance of the cup shattering when the candle’s burning, do you reckon?
I may just have to give this a whirl, as a skint stay-at-home Mum, I’m looking for ways to give gifts without bankrupting myself. Have a new love for crafts but alas the amazing ideas in my rarely tend to look like a right old mess. Hence I just blame my toddler…
see? Can’t even leave a comment without it being nonsense. I trust that you knew what I meant?!
I know what you mean ;o) not tested the burning of it yet but will report back, if I’m honest I did worry about that too!
Yay! Glad you gave it a go. Looks fab! There is a crafter down here that sells them and she also does them in old glass jelly moulds and also old 50’s style milkshake glasses which look amazing! She uses soya wax and then adds scent to them not sure how though. Would require more googling. She has an amazing smelling on called key lime pie! X
Right! That’s my next challenge then!!
Such a lovely gift idea, I always look for ways to give cheap but nice presents, being as I now don’t have a paid job. This is going to go on my list of things that I’d like to do if I ever get round to more craft one day! Thanks 🙂
Ah yes, always a bit of an issue to find crafts you can afford to do!
This an awesome idea!!
Definitely going to try 🙂
Hattie xo
Thank you 🙂 I’ve just got some more wax through the post, loved making this and really looking forward to doing more!
I love making candles and am building up to making some teacup candles shortly! Just a quick hint, don’t throw wax down the sink it will harden in your pipes and cause a blockage eek! The best way I’ve found to clean pretty much everything you use to make candles is to place everything in the oven on a low heat on top of a tray of paper towels, the wax all runs off and soaks into the towels 🙂 then give everything another quick wipe when you take them out and you’re done! 🙂
Brilliant bit of advice!! Thank you 😀
Couldn’t you use disposable aluminium tins to melt the wax in? Prevent all this dreaded long winded washing up process! Once you finish just pop it in the bin.
Love the idea, about to go on ebay and order me some supplies 😉
Thank you x
Ooh, that’s a good idea! Fully admit that I am too damn tight to buy those but as long as they don’t get too hot (the wax bursting into flames issue) I can’t see a problem with it 🙂
I love this. I made one the other day with some bits of old candles. Doesn’t look as good as this though.
Love teacup candles – so cute! I’ve done soya ones (http://hodgepodgecraft.com/2013/07/how-to-make-scented-candles-in-a-teacup-a-step-by-step-tutorial/), but not beeswax yet. I wonder if the wax would clean off a glass or stainless steel bowl more easily than a saucepan? I didn’t find soya wax difficult to clean (but then I didn’t get the beeswax look or smell)… Some experimentation needed! 😉
#Pintorials
So pretty. It does make a lovely gift. Not made a tea cup candle before, but I have made dip candles and jam jar ones. I put the wax in an old coffee can and melt it over the saucepan. Any left in there is cooled and lid put on for next time. Then next time, I just add more wax. No washing up required, or waste. Love the smell ( Can I admit that I sometimes lift the lid just for a does of beeswax aroma!!) #pintorials
Jam jar ones sound lovely! Great idea about the coffee jar as well 🙂
Love this. I collect vintage teacups, I collect candles, so what a way to combine the two!
Visiting from the #pintorials linky
This looks so lovely, I may have to have a go! I have an old saucepan that needs to be chucked anyway so it would be perfect!
That sounds like a great idea 🙂
This is so pretty and a beautiful present.
Thank you 🙂
That is so pretty, I’d want to keep it. I might try this, just need to keep an eye out for a teacup. #betterphotoproject
Genius – and the 50 Shades bit made me spit coffee on my Macbook!
Such a lovely gift, and they get something equally lovely when the candle is finished too! 🙂
Must say I laughed when you gave instructions about the wick and that it was not a 50 shades blog! Superb gift idea too.
My pinkie just automatically went up! So dainty! #betterphotoproject
I love vintage tea cups. If i had room i will fill a hutch with them… great use of this one. I may do this for my living room.
Send me a picture if you do 🙂
I’ve been looking for a tutorial like this! Found a bunch of vintage teacups, and wanted to try candles with them. Thank you for sharing! stopping by from SITS
Aww, that’s brill, hope it helps!!
I have been amassing teacups for a while now, planning to do this for wedding favors. We are expecting around 200 people and want to make one per family, possibly one per adult. Got the teacups now the only problem is to figure out how much wax I’ll need. We were thinking of using paraffin as it tends to be cheaper since we are making so many. What size were the blocks you used?
No idea what the exact measurements are but they are small enough to hold in your hand, I always need two per cup.
Heeellpp! So i saw this tutorial and decided to try make my first teacup candle…it all was going so well until the wax cooled in the teacup and it started coming away from the sides of the cup…if I turn the cup upside down the whole candle falls out of the cup!…has anyone else experienced this? What am I doing wrong? 🙁
Oh I’m so sorry but I have no idea 🙁 Maybe it’s the kind of wax you used? That’s a total guess though.
Yeah, maybe the wax you used shrinks when it hardens. I’m not sure, but maybe you could pour some more melted wax down the sides of the thing after it’s peeled away, and if that also peels away, just keep on doing that until there’s no more space in between the wax and the cup.
If you want to make your candle stay in the cup, you could put some blu-tack on the bottom (not sure what that would do once it’s heated up, depending on the type of wax you used, but I saw a video online where the person put blu-tack on the bottom of her wick to make her soy candle stay in place).
Anyways, I bought some beeswax tealights a month ago, and their candles didn’t stay in the cup either until you lit it and the beexwax melted, and then hardened afterwards! So candles not staying in the cup is completely normal 🙂
If it won’t stay, you could also make a candle that’s slightly bigger than your cup, and then put it in the other cup. Of course, that’s not very reliable….
I’ve done several teacup candles. They are delightful! I use paraffin, soy, or gel wax, scented with essential oils.
Why don’t you use and old tin can to melt your wax in? Then all you have to do is throw it away after you use it to melt the wax.
Good idea!
Will the teacup heat up too much? Does it matter what kind of teacup you use? Also, does it matter what the wick size you use is? Thanks!
Also, I love this DIY by the way! And that you added how to clean up afterwards 🙂 That was really helpful