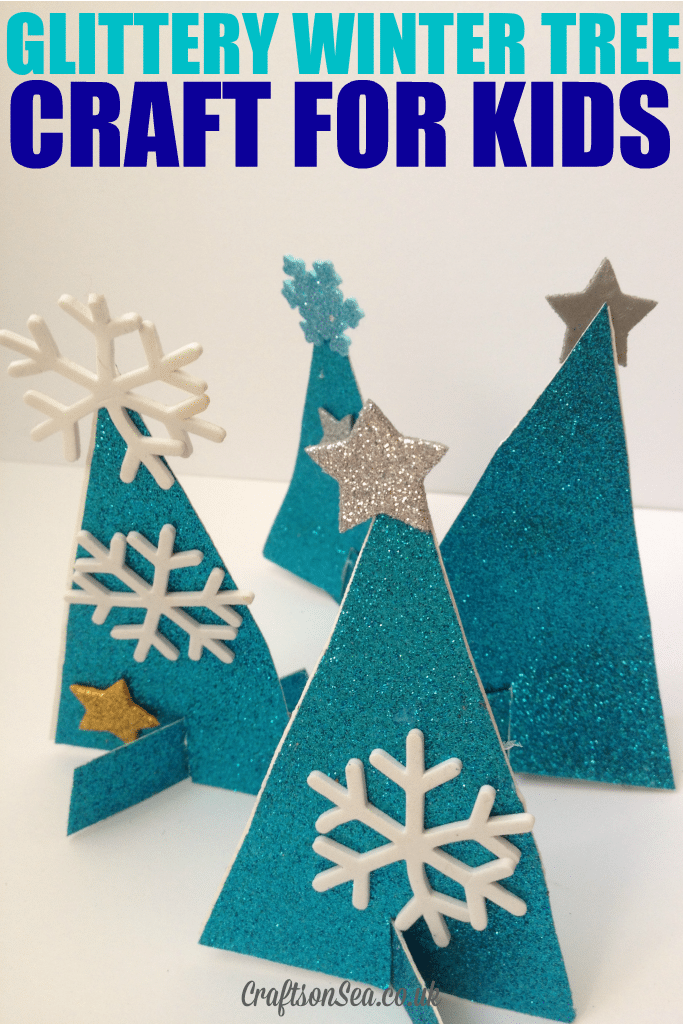
The leaves are nearly all fallen from the trees down our road now and on the walk to school even my four year old points out that it means we’re nearly in winter now. This cute winter tree craft for kids is a great way to welcome in the season and is a fun way to start decorating your kids room up if you can’t face Christmas decorations yet! What’s more as its a pretty winter craft it will still be looking good in January and February, making it a craft that lasts a little bit longer than your traditional 12 days of Christmas!
What You'll Find on This Page
You will need:
Glittery blue card (you could change this for glittery green card if you wanted to make glittery Christmas trees)
Glue – we used Bostik White Glu
Stickers
Scissors
How to make your winter trees
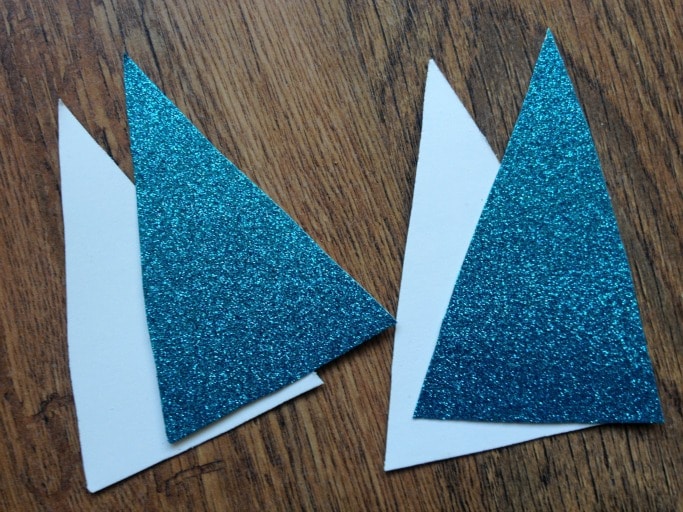
Fold your glittery paper in half and cut out triangle shapes, this ensures that both sides of your trees will be the same size.
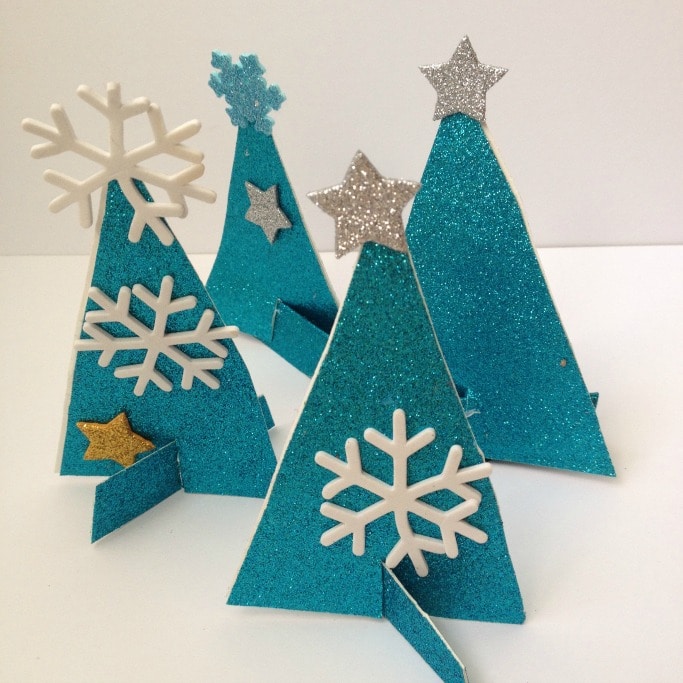
Glue both sides of your trees together using the glue. Once they are stuck decorate your trees with some wintery stickers, we loved these snowflake ones that I picked up at The Range.
To make the stand for your trees either cut out two rectangle shapes and stick them together or cut out a rectangle from where your glittery card was folded. Cut a small slit into the bottom of your trees and push the rectangle into place to hold them up.
I made this winter tree craft together with my four year old who is ill at the moment so it was a nice simple craft that we could do without too much stress!
More Winter Tree Crafts for Kids
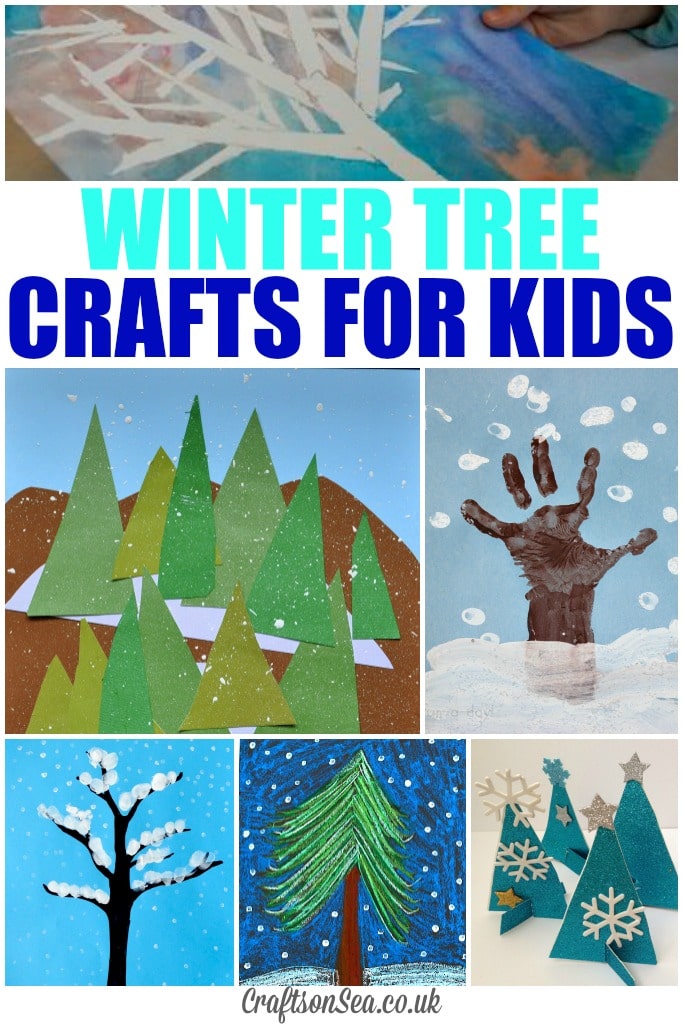
Inner Child Fun shares how to make a winter tree silhouette.
I Heart Crafty Things shares a tutorial for this sweet snowy mountain winter tree art.
Fun A Day make a cute winter tree using handprints.
Easy Peasy and Fun make a winter tree craft using finger painting.
Buggy and Buddy use oil pastels to make this gorgeous winter tree.
And finally our glittery winter trees!
* We were sent some craft materials from Tots100 as part of their #bostikbloggers campaign.
Leave a Reply