Advert. With the summer holidays here I’m really excited to be able to share this post with you as it contains not one but two great ways to keep the kids busy – this cute sea paper plate craft and details of how you can take the kids to Sea Life for free with Crayola!
Like most parents I love having the long summer holidays with my kids but I also know that I need to plan some kind of activities in to keep us all happy.
With this fun craft and a great day out you’re one step closer to making sure your summer holiday is the best one ever.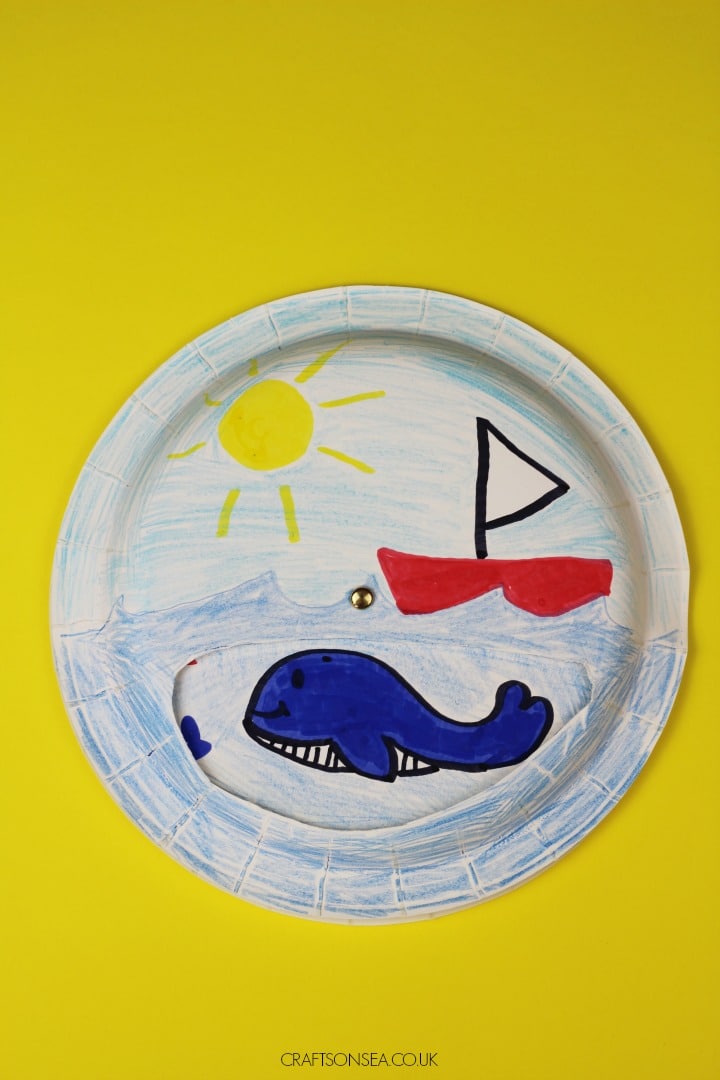
Kids Go Free To Sea Life
This summer pick up a promotional pack of Crayola’s and you’ll get a kids go free ticket to any of the Sea Life centres in the UK and Ireland.
Find out more about Crayola Kids Go Free here and get planning your next trip, with animals including seahorses, turtles, sharks and of course fish they’ll be loads to inspire you for your ocean paper plate craft!
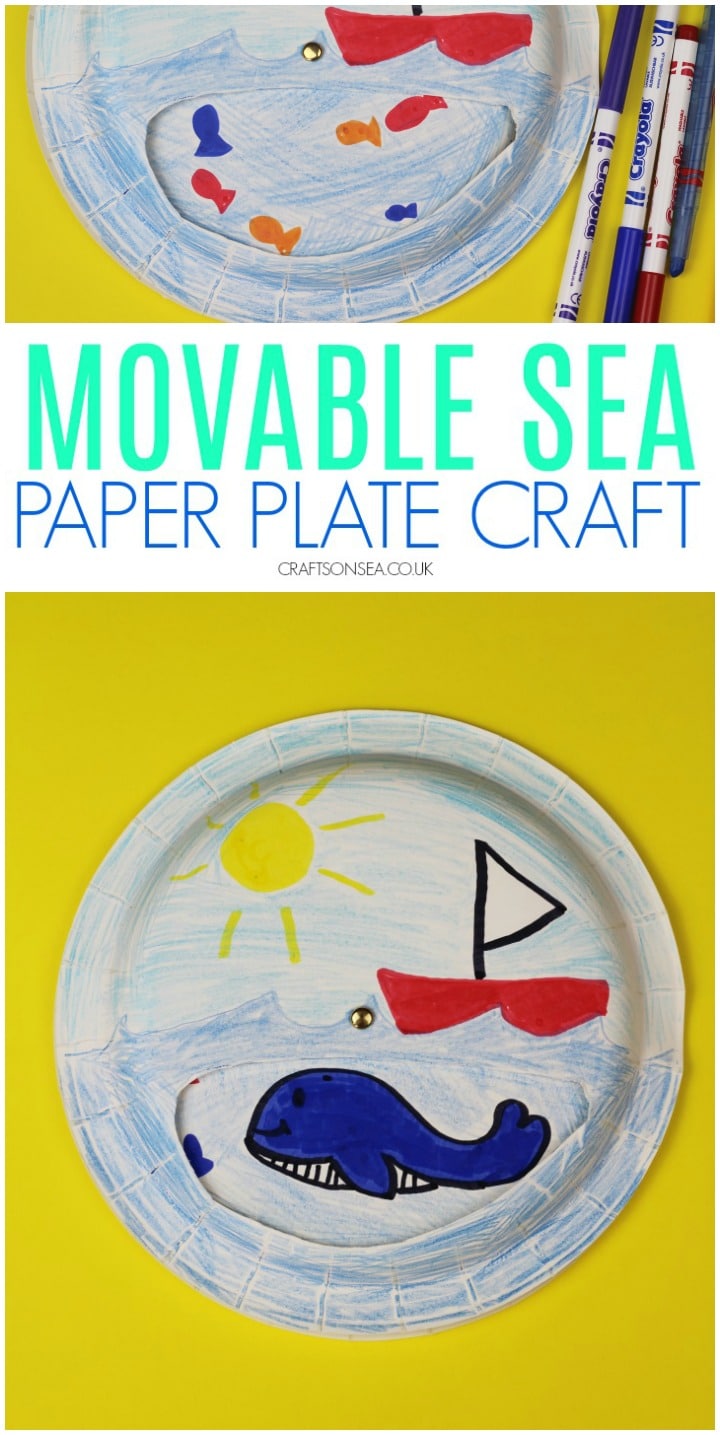
Movable Sea Paper Plate Craft
We love paper plate crafts and I think that movable ones are the most fun of all. This craft will require a little bit of help to push through the split pin and younger children may need help with the cutting but it’s a great excuse for a bit of creativity – what will your child draw in their ocean?
If you’d like to see how I made this craft you can watch the video below. Prefer written instructions? You can find the materials list and instructions underneath it.
To make this craft you will need:
- Two paper plates
- A split pin
- Scissors
- Biro
- Crayola Colouring Pencils or Twistables
- Crayola Markers
Like this craft? Make sure that you bookmark this page or pin an image so that you’ve got it to hand when you need it.
Lets Make It:
Start by making a hole in the middle of your paper plates that your split pin will go through, to do this place your plates on something soft such as wall tack or similar and then push a biro through the middle.
Decide which plate will go on top and cut a section out of your paper plate putting the other plate aside for later. This should be roughly half of the plate but you will want to leave the edge around the plate and also leaving the section with the hole for the split pin intact so you can put the two paper plates back together later.
Draw a line across the intact half of your paper plate to show where the sky and the sea meet.
Using your Crayola Markers you can now add some details like a boat, the sun or maybe a seagull or two.
Once you’ve drawn these details you can now colour in your background using Crayola Crayons or Twistable Colouring Pencils.
Next up is your other paper plate showing your under the sea scene. Using your Crayola Markers draw in some sea creatures, make sure that they are near the border of your paper plate rather than in the middle so that you will be able to see them when your plate spins.
Once your sea creatures are complete colour in the rest of this plate blue using your Twistable Pencils or Crayola Crayons.
Make sure that you use the same shade blue for the sea that you used on your other paper plate so that they will match.
Finally place your sea and sky paper plate on top of the ocean animals one so that the two holes in the plates line up.
Push a split pin through the holes and spread the pin out at the back to hold it in place. You can now spin the second plate to see the sea life swimming through the sea!