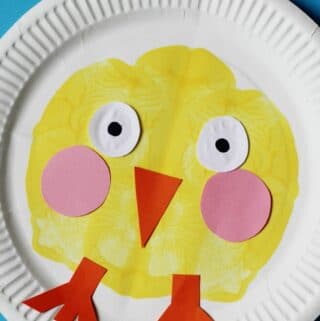
Paper Plate Chick
Make a simple paper plate chick craft that's perfect for Easter or as a farm animal craft.
Print
Pin
Equipment
- Yellow Paint
- Scissors
- Glue
- Black pen
Materials
- 1 Paper Plate
- Scrap paper white
Instructions
- Fold your paper plate carefully in half to give you a rough idea of where your centre line will be.
- Pour some yellow paint into the centre of the plate and fold it closed again.
- With the plate closed push down on it with your hands to move the paint out from the centre towards the edges, do this in all directions to get a round shape rather than just one line. You might also want to encourage your child to stop before the edge of the plate so that paint doesn't fall out of the edges.
- Open the plate back up and leave to dry.
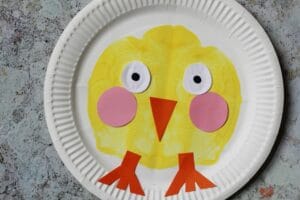
- Meanwhile cut out the body parts for your chick. From orange paper or card cut out a beak shape and two feet.
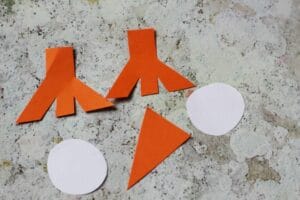
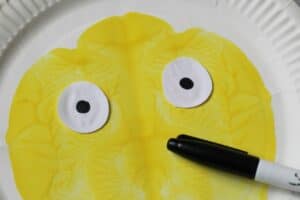
- From white scrap paper cut out two circles for eyes and then draw a black dot in the middle for their pupils.
- You can also cut out two circles from pink card to make cheeks. These obviously aren't essential but I think it looks cuter and I'm a big fan of cute crafts!
- Glue the beak, eyes and cheeks onto your chick.
Notes
You could also add wings for your chick using either wing shapes cut out of paper or feathers.
Tried this?Mention @craftsonsea - we'd love to see and maybe share it!